What are Fragments in Android
A Fragment represents a behaviour or a portion of user interface in an Activity. We can combine multiple fragments in a single activity in order to build a multi-pane UI and reuse a fragment in multiple activities.
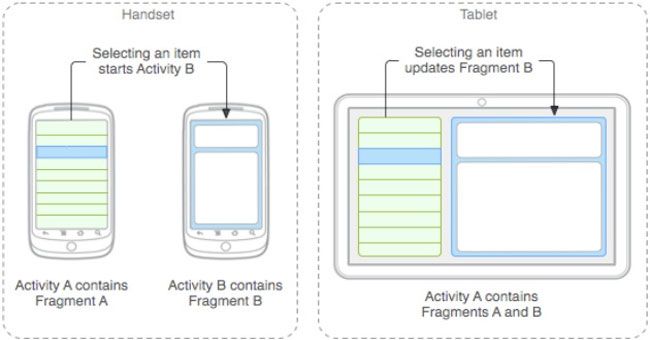
The biggest advantage of the fragment is that it simplifies the task of creating UI for multiple screen sizes. An activity can contain a various number of fragments.
Please follow the steps below in order how to use fragments in Android:
Step 1) First create a new project for this fragment example name project as Fragment.Then choose the default, minimum STK and, note that we can use fragment above API 11 so it’s better to use API 11 or above to use fragment in a better way so we will use API 11 or android 3.0 which is honeycomb and then click next and create a blank activity, click next and then leave all the field as default and click finish.
Read Here Start New Activity on Button Click in Android
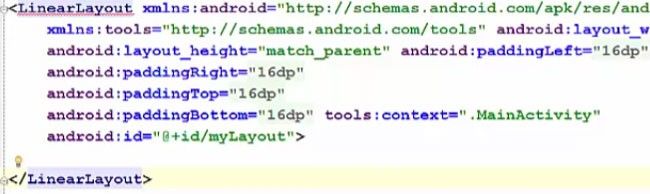
Step 2) So now our blank project is created and going to your textview of this java file activitymain.xml and instead of relative layout, we are going to use linear layout here, therefore, change this relative layout to linear layout.
<LinearLayoutxmlns:android="http://schemas.android.com/apk/res/and
      xmlns:android="http://schemas.android.com/tools" android:layout_
      android:layout_height="match_parent" android.paddingLeft="16dp"
      android:paddingRight="16dp"
      android:paddingTop="16dp"
      android:paddingBottom="16dp" tools:context" .MainActivity"
      android:id="@+id/myLayout">

</LinearLayout>
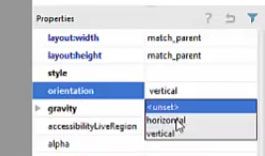
Step 3) Now when you change this layout here from relative layout to linear layout, you will be able to see an error, this error is nothing but, you know, whenever you add some child to you activity then this error can occur. So for fixing this error, what you need to do this you need to go to the property here and in there, you go to the property called orientation and change the orientation to vertical and this error will be gone.
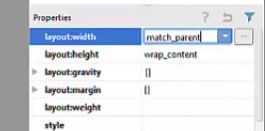
Step 4) Now what we are going to do is we are going to take two buttons and we are going to, listen for these button click events and we will try to open two different fragments using these two buttons therefore rename these buttons as, for example fragment 1 and the second button as fragment 2 and change the property, layout width property of these two fragments to Fill or Match parent.

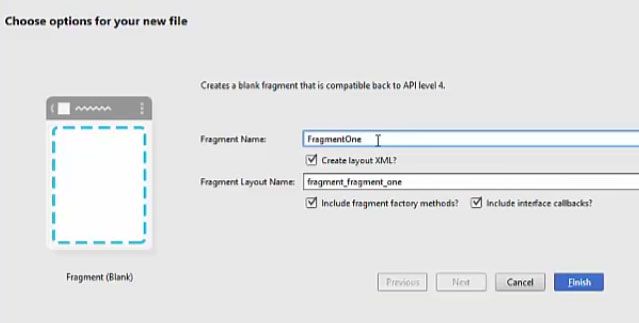
Step 5) Now we have to add some fragment to this project. So go to your app folder and inside this app folder, go to resource directory and inside this go to this layout folder where your activity_main.xml file is there. Now just click this layout folder and right click it and create new and we are going to create a new fragment which is a blank fragment and we will name this fragment as, for example, FragmentOne and click finish.
Step 6) In the same way we will add the second fragment so right click on layout -> new fragment -> blank fragment and name it as FragmentTwo. And now we have 2 fragments created FragmentOne and FragmentTwo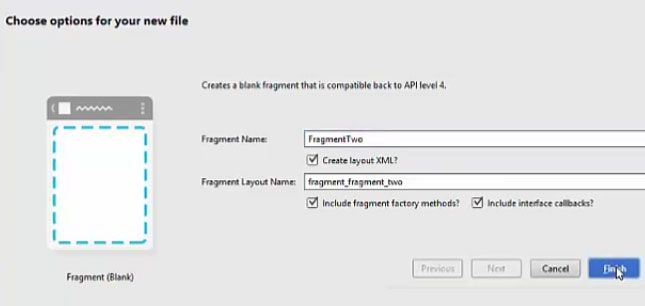
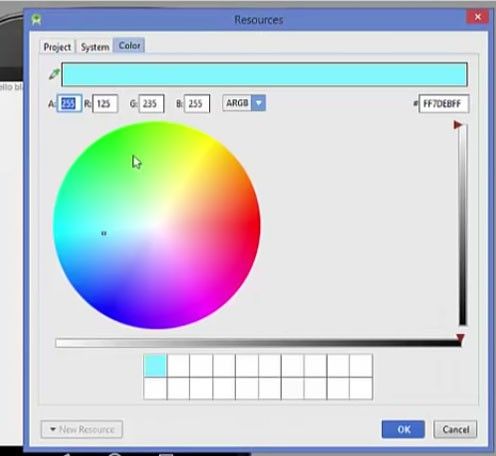
Step 7) Now let’s change the background colour of these two fragments so that we can recognize the fragments, so, for example, FragmentTwo we will just change the background colour to little bit reddish and for FragmentOne green
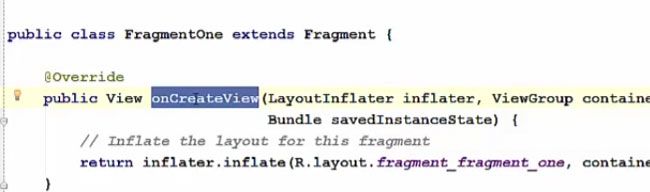
Step 8) Now you will be able to see inside your java folder, that there are two java file will be created FragmentOne and FragmentTwo that are fragmentone.java, just click this fragmentone.java file and in here you will be able to see this all code is created by Android Studio for you, So in order to make things simple just remove all the code and just leave one method here and this method will be onCreateView method and all the other method and we will do the same for FragmentTwo also.
public class FragmentOne extends Fragment (
   @Override
   public View onCreate (LayoutInflater inflater, ViewGroup contain
                        Bundle savedInstanceState) {
     //Inflate the layout for this fragment
     return inflator.inflate (R.layout.fragment_fragment_one, contain
}
Step 9) Now once again go to my activity_main.xml file and try to add this fragment in this remaining space in the Android Activity, so just go to textview and just add a fragment and this will create a fragment for you and you can choose which width and layout height you want,
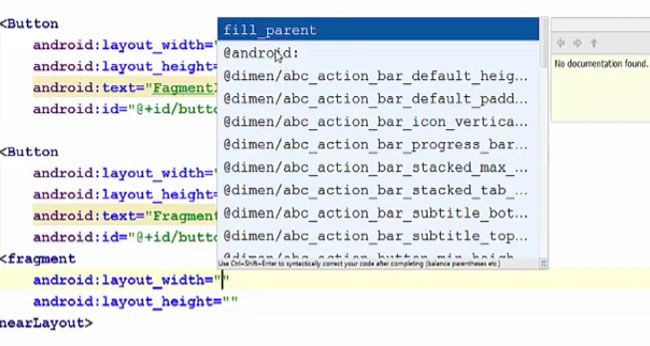
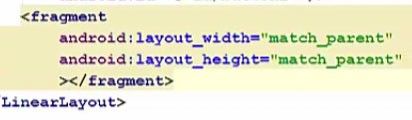
So we want to add match parent for the height and width.
<fragment
    android:layout_width="match_perent"
    android:layout_height="match_perent"
    ></fragment>
LinearLayout>
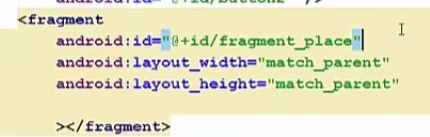
Step 10) Now you can add some more properties to this fragment like ID, for example, we will name as fragment_place.
<fragment
    android:id="@+id/fragment_place"
    android:layout_width="match_perent"
    android:layout_height="match_perent"
    ></fragment>
Step 11) Now you can also add the default fragment here so that whenever we will run our activity.So what we are going to do is, we are going to add a default fragment to it so just write android: name and we will add a default fragment and inside double quotes go to your fragment_one.xml file in here and just copy the name of the fragment from here or context, and paste it
<fragment
    android:name="com.example.programmingknowledge.fragmentexample.
    android:id="@+id/fragment_place"
    android:layout_width="match_perent"
    android:layout_height="match_perent"

So this end the design part of our fragment therefore now let’s add some code to our mainactivity.java file,
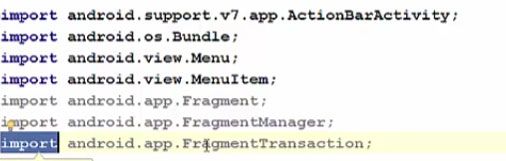
Step 1) Now go to the mainactivity.java and in here, we need to import some library to add some fragment, fragment manager and fragment transaction. So just add or import these three libraries which are first import android.app.fragment, second is import android.app.fragmentmanager which we will use to change fragment or remove fragment, and the third library called android.app.fragmenttransaction.
import android.support.v7.app.ActionBarActivity;
import android.os.Bundle;
import android.view.Menu;
import android.view.MenuItem;
import android.app.Fragment;
import android.app.FragmentManager;
import android.app.FragmentTransaction;
Step 2) Now add a function and pass an argument 'View view'.
public void ChangeFragment(View View) (

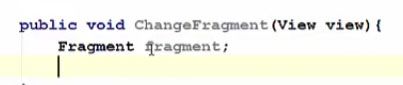
Step 3) Now inside this method or function, first of all, we will create an instance of the fragment which we can name for example 'fragment' itself.
public void ChangeFragment(View View) (
     Fragment fragment;
Step 4) Now we want on button click event, in order to open the fragment, So what we are going to do is we are going to check which button is clicked first so:
if ( view == findViewById(R.id.button) ) {

Otherwise, if the other button is clicked
if ( view == findViewById(R.id.button2) ) {

Step 5 )Now inside these, if conditions, if button one is clicked, then we will assign this instance the object of fragment one. So we can use polymorphism property here, so you know, to this fragment instance which is an instance of fragment, we can just assign a new FragmentOne class or object
if ( view == findViewById(R.id.button) ) {
    fragment = new FragmentOne ();

And if the button 2 is selected, we will just call FragmentTwo class.
if ( view == findViewById(R.id.button) ) {
    fragment = new Fragmenttwo ();

So we have created FragmentOne and FragmentTwo classes whenever we have created this layout, it automatically creates these classes.
Step 7) Now once you have assigned these instances of FragmentOne and FragmentTwo to the main fragment instance, now we will add a fragment manager and then we will do some transaction and then we will create an instance of fragment transaction.
if ( view == findViewById(R.id.button) ) {
   Fragment = new FragmentOne ();
   FragmentManager fm = getFragmentManager();
   FragmentTransaction ft = fm.beginTransaction ();

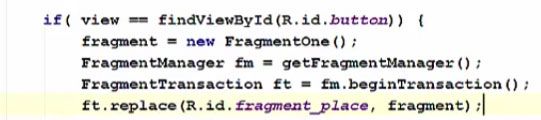
Step 8) Now using this fragment transaction, what we want to do is we want to replace or we want to replace the fragment to FragmentOne if the FragmentOne, FragmentTwo is placed in the fragment in our main activity then whenever button 1 will be clicked, it will replace the fragment to FragmentOne.So we will just use this ft.replace and this replace function takes two arguments. One is the fragment id and the second argument it takes is the fragment instance.
if ( view == findViewById(R.id.button) ) {
   Fragment = new FragmentOne ();
   FragmentManager fm = getFragmentManager();
   FragmentTransaction ft = fm.beginTransaction ();
   ft.replace (R.id.fragment_place, fragment);
}
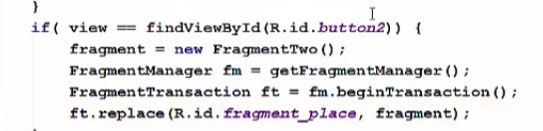
Step 9) Now we will do the same for the other if condition if button 2 is selected, just copy and paste it from above with no changes.
if ( view == findViewById(R.id.button) ) {
   Fragment = new FragmentTwo ();
   FragmentManager fm = getFragmentManager();
   FragmentTransaction ft = fm.beginTransaction ();
   ft.replace (R.id.fragment_place, fragment);
}
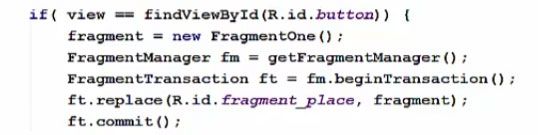
Step 11) Now whenever we call FragmentTransaction, we need to commit this transaction therefore
if ( view == findViewById(R.id.button) ) {
Fragment = new FragmentTwo ();
FragmentManager fm = getFragmentManager();
FragmentTransaction ft = fm.beginTransaction ();
ft.replace (R.id.fragment_place, fragment) ;
ft.commit ();
,
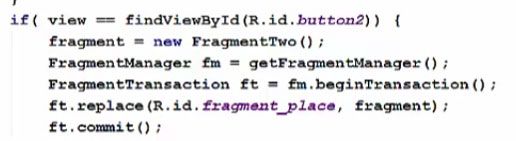
if ( view == findViewById (R.id.button2) ) {
Fragment = new FragmentTwo ();
FragmentManager fm = getFragmentManager();
FragmentTransaction ft = fm.beginTransaction ();
ft.replace (R.id.fragment_place, fragment) ;
ft.commit ();
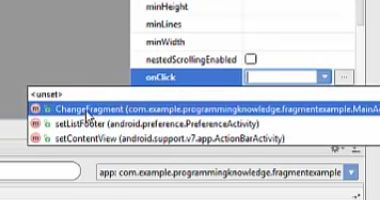
Step 9) Now one more thing which is remaining is we need to add this method to the button click event of button 1 and button 2. So we have created this ChangeFragment method so go to your main activity or activity_main.xml and in here, just choose the button 1 so just select button 1 and search for the property called onClick and select your method which you have created, ChangefFragment.Same we will do for fragment 2.
Now our program is running, you will see default this fragment 1 is selected here. If you remember, we have given a green colour to fragment 1 and red colour to fragment 2. So click this fragment 2, the fragment 2 will be set in here, right, and whenever I click fragment 1, fragment 1 is set so you can just change these fragments by clicking these buttons.Now in these fragments, you can create you, you know, functionality like if you want to add some image, you want to make some registration form or some, you know, some UI which you want to add to the fragment and on the button click, these fragments will be, you know, replaced on the fly whenever you click the button.