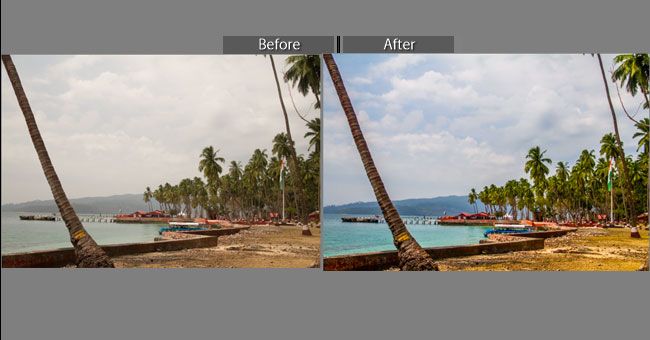
In this tutorial, we will learn how to transform normal landscape photo into amazing landscape by doing some simple changes such as Highlights, Shadows, Whites, Blacks, Clarity & Vibrancy in Lightroom.
These tips can be used in editing all type of Landscape, Sunset and Monument, River Waterfall photos.
There are some basic problem in all Landscape Photos such as
1.Bright Sky
2.Dark for ground
3.Less color and contrast.
To do this Just import the photo in your Lightroom by simple drag and drop you Photo in Library View.
1.Open Light Room
2.Press G to move to Grid View
3.Drag and Drop the photo from your directory
4.Press D to open Photo in Developer Mode
In the developer, move use the given below setting
Basic Edit
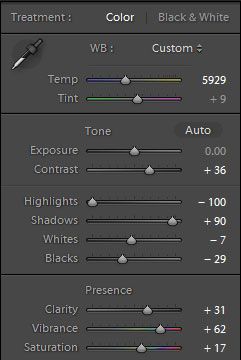
1.Temp: Adjust Temp to give Cold or Warmth to your Photo
2.Exposure: If your photo is underexposed then we can increase the value to words plus sigh and give brightness to Photo
3.Contrast: Increase the Contrast that looks nice.
4.Highlights: Decrease highlights to -100 to give more clearly to clouds.
5.Shadows: Increase the shadows because it will make all your dark part more visible
6.Whites: Decrease a little while to bring all your bright part more clarity
7.Blacks: Decrease the black so that it will give more contrast to the darker part
8.Clarity: Increase the clarity to give more detailing in the photo
9.Vibrance: Increase Vibrance to give more natural color.
10.Saturation: Increase Saturation if you want to add some extra color to Photo.