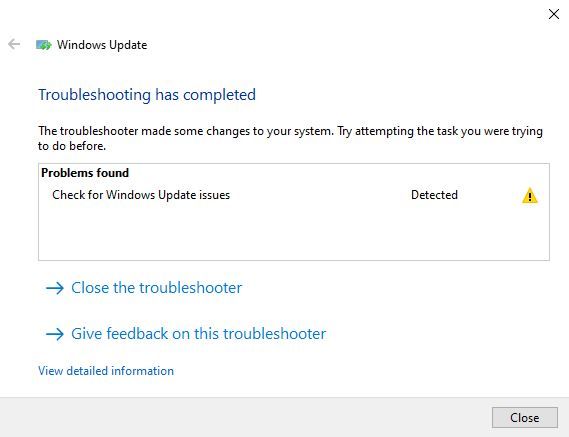
Updating software may not be the most interesting pastime in the world. But your trusty Windows OS has your back right? Wrong! Occasionally, you might find yourself staring at your PC or laptop screen with a message like this –
“We couldn’t install some updates because the PC was turned off”
This can happen when Windows has not done its job properly, i.e. updating itself. It might have downloaded the updates, but failed to install them.
Let us see how we can fix this issue.
Method 1: Basic Solution
Step 1
The first step must be verifying whether the updates were properly installed. Go to the Settings > Update & Security > Windows Update > View installed update history. If you see that the updates have been installed, don’t worry about the error message. If not, then move on to the next step.
Step 2
Make sure your laptop is charged or is connected to a power source. Click on the Update button to start the process again. The system must be awake and not go idle till the process is over.
Method 2: Temporarily Disable Antivirus Software
Sometimes, your third-party antivirus software is the main culprit behind this issue. So, while updating Windows, you must disable the software temporarily to avoid errors. Don’t worry, as Windows Defender is protecting your PC.
If this strategy still does not work, try uninstalling the antivirus completely and then restarting the update.
Method 3: Perform a Clean Boot
Another way to solve the issue is to perform a clean boot of the machine. Certain third-party applications running in the background may come in the way of your Windows update.
Here are the steps to perform a clean boot –
- Press Window + R to open the Run dialog box

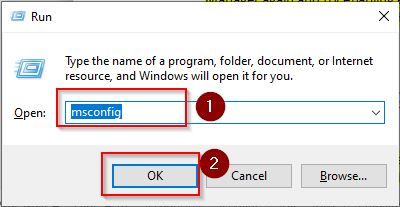
- Next type msconfig in the run box and press Enter
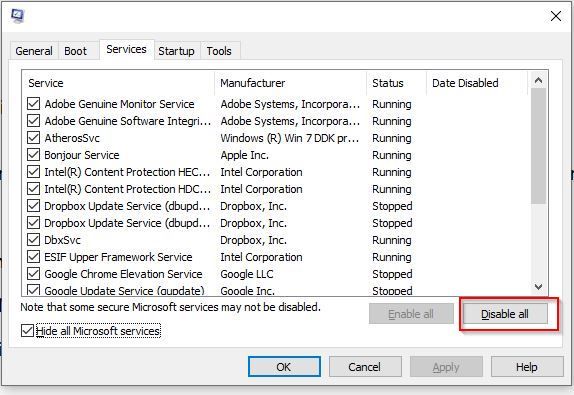
- Now go to the Services tab and select “Hide all Microsoft services” option
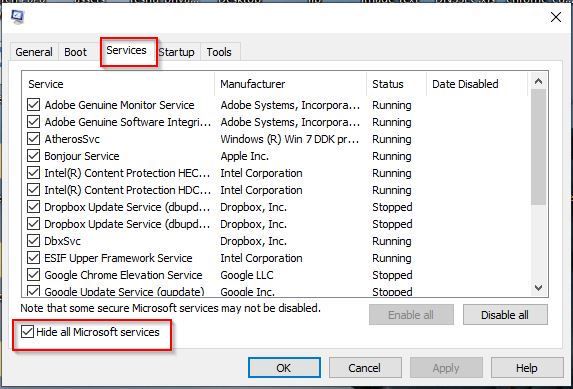
- Next, click the Disable all option to disable all third-party services
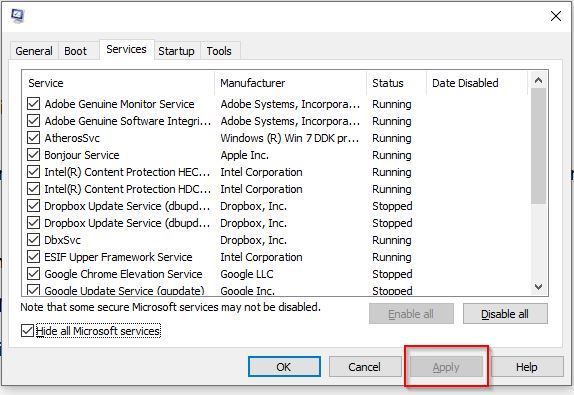
- Now click on Apply and Exit. Now all the third-party services will be disabled
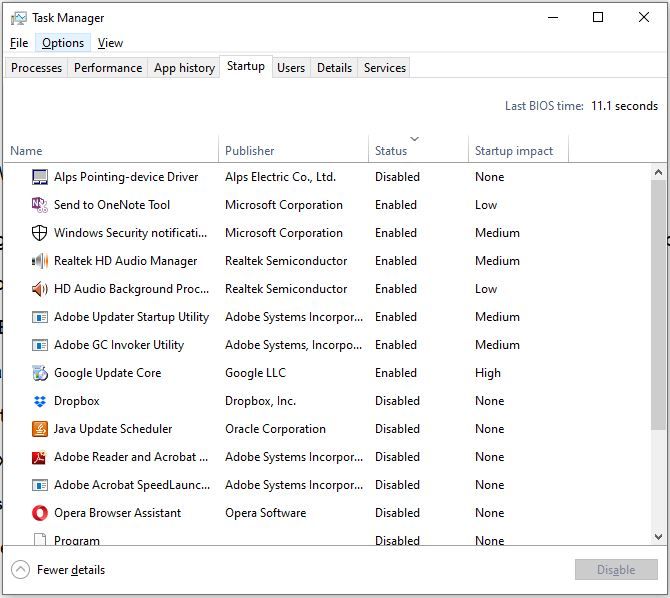
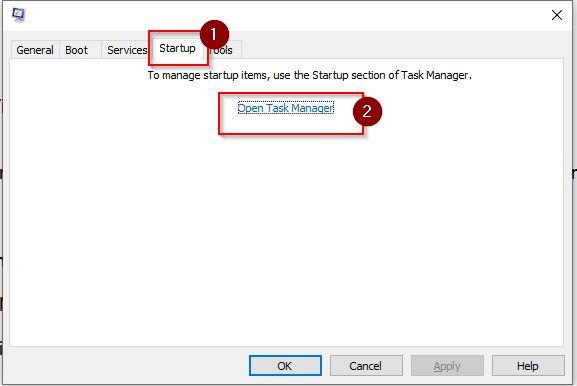
- Next, go to the Startup Tab and click on “Open Task Manager”
- Now in the Task Manager window disable all the services one by one
It’s now time to reboot your system again. See if the problem has been fixed. If you still find that the updates are not being installed, try enabling each application you just disabled, one by one. Soon, you will observe which application is causing the issue.
Method 4: Delete Contents of the Software Distribution Folder
The updates downloaded by Windows reside in a folder in your system, called “SoftwareDistribution”. After updates are installed, these files are automatically deleted. However, these files may not be cleaned up properly and can get corrupted.
So, you can manually delete these folders after halting the Windows Update Service. Let us look at the steps –
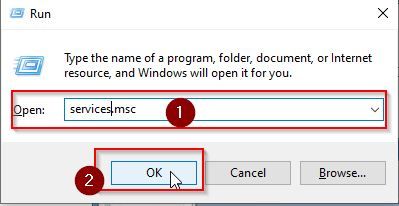
- Press Window+R to open the Run dialog box

- Next type servive.msc in the Run dialog box and press Enter
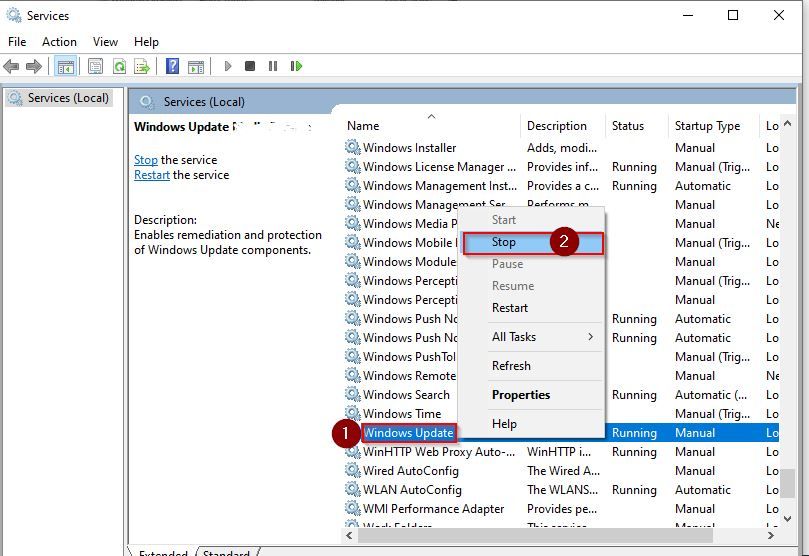
- Next in the Services window, Right-click on Window Update and click Stop
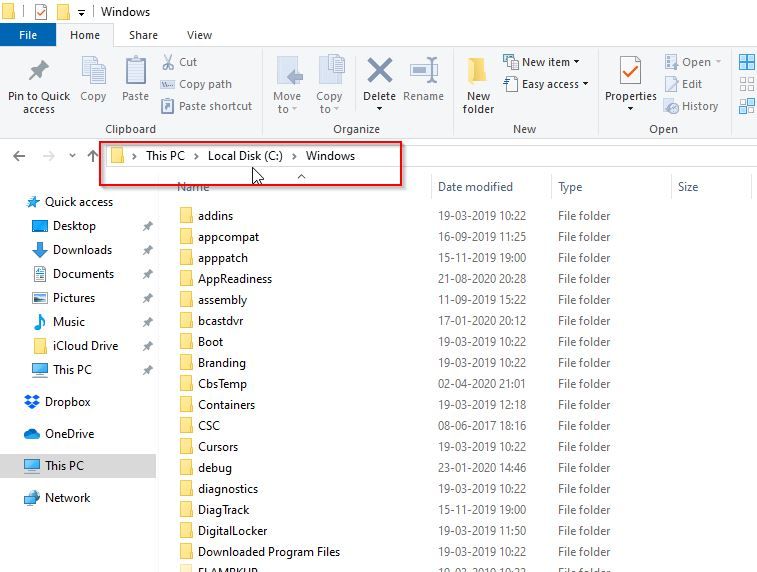
- Now go to C:\Windows folder in your PC
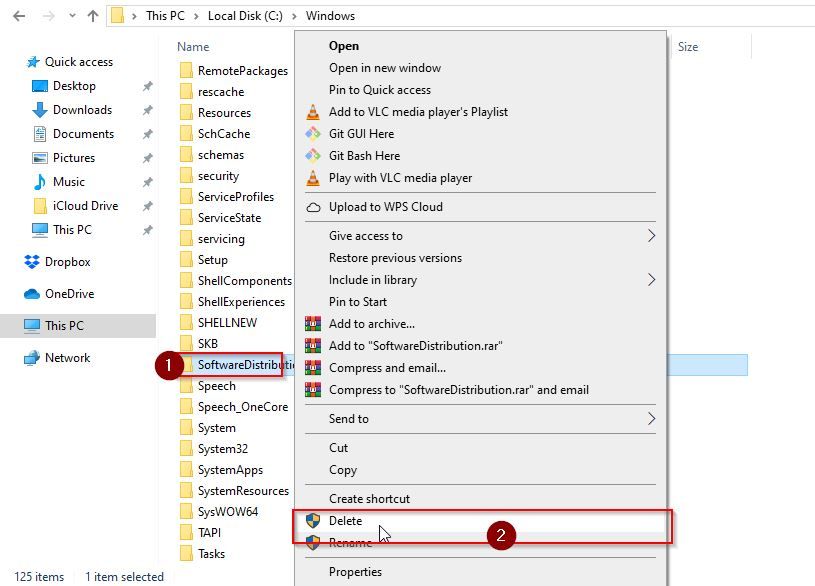
- Next search for SoftwareDistribution (C:\Windows\SoftwareDistribution)folder and delete it
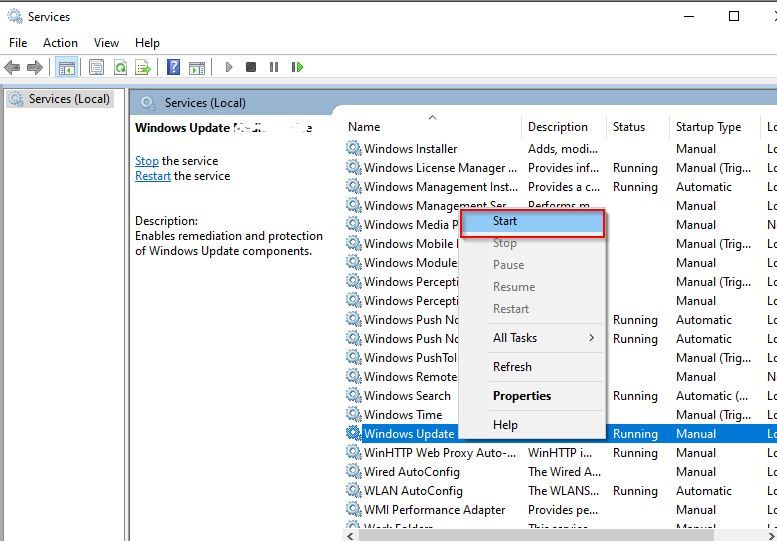
- Now navigate back to Services Window, Right-click on Window Update and click on Start
Now try installing the updates and see whether the error persists.
Method 5: Check your Disk Space
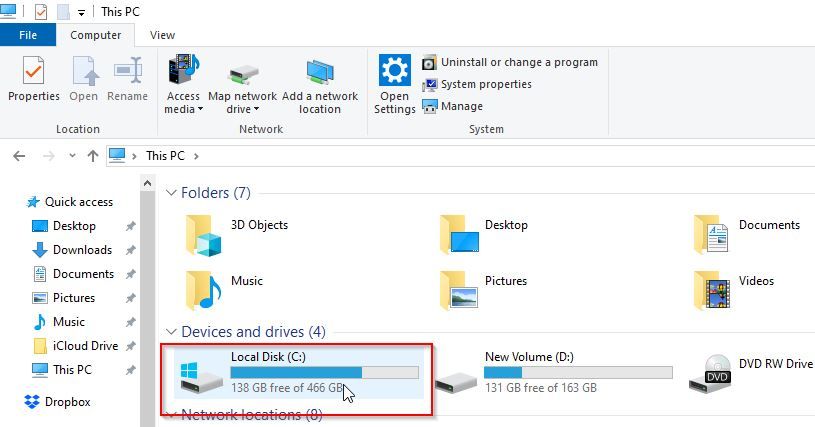
Before installing the updates, Windows will check whether there is enough disk space to install them. It is recommended that you have more than 10 GB of free disk space for the updates. Your C drive must not be completely occupied, as there is where all the action takes place! (update installation)
Follow the steps below to verify disk space –
- Go to the Window Search Bar, type in File Explorer and click Open or press Enter
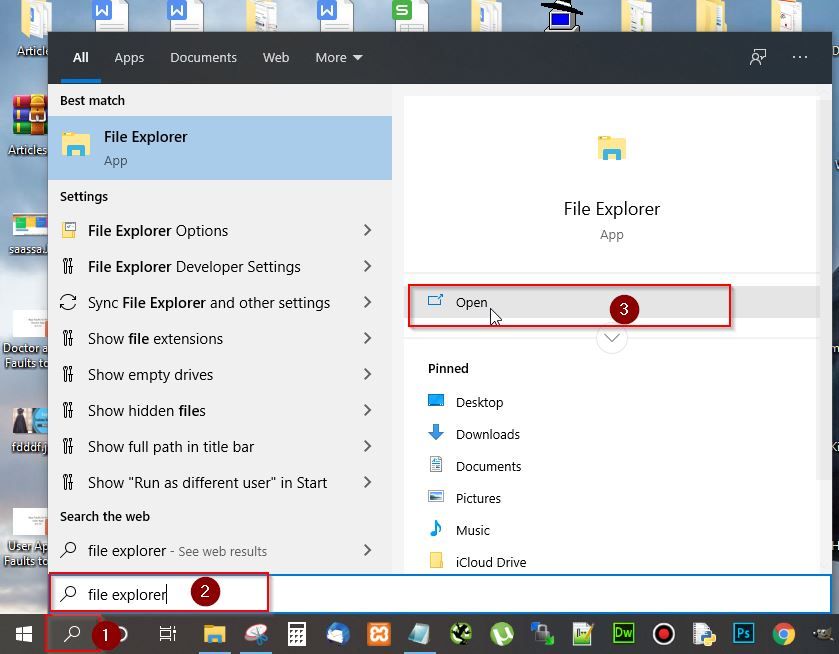
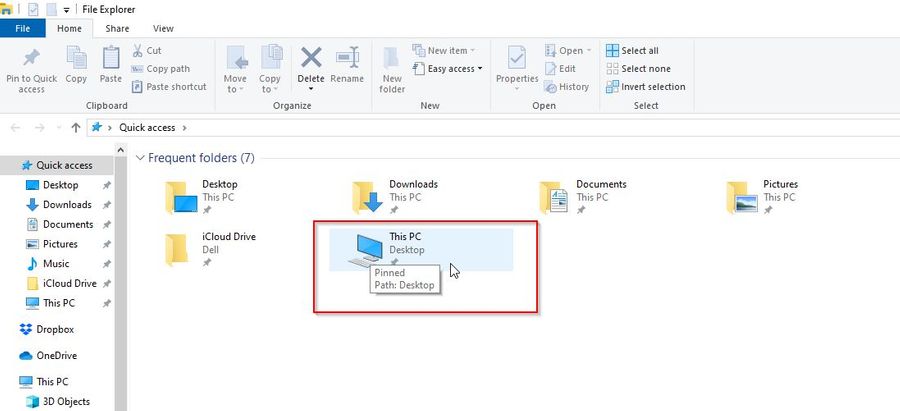
- Next click on ‘This PC’
- Check how much space you have in the C drive. If there is less than 10 GB of space left, you have to delete some files
- For this, right-click on the C drive and select Properties
- Select the checkboxes for the junk files to delete and click OK
- Then, manually uninstall programs or delete other files within the drive
Try installing the updates now and see if the issue is resolved.
Method 6: Manually Install Updates
When things are not in your favour, you need to step up your game! A straightforward way to resolve this issue is to manually install the updates.
Here’s how to go about it –
- Go to Window Search Bar, type in Settings and click Open or press Enter
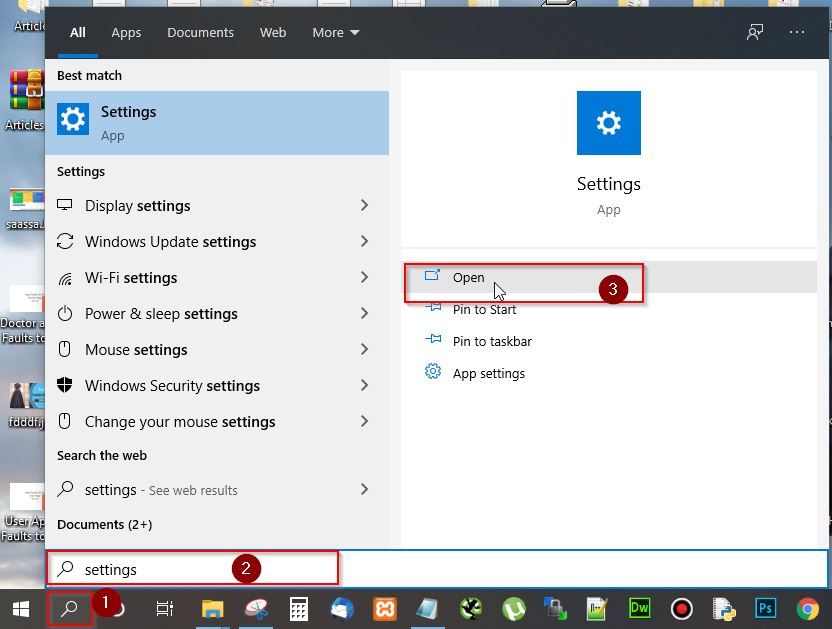
- Next, scroll down and click on Update & Security
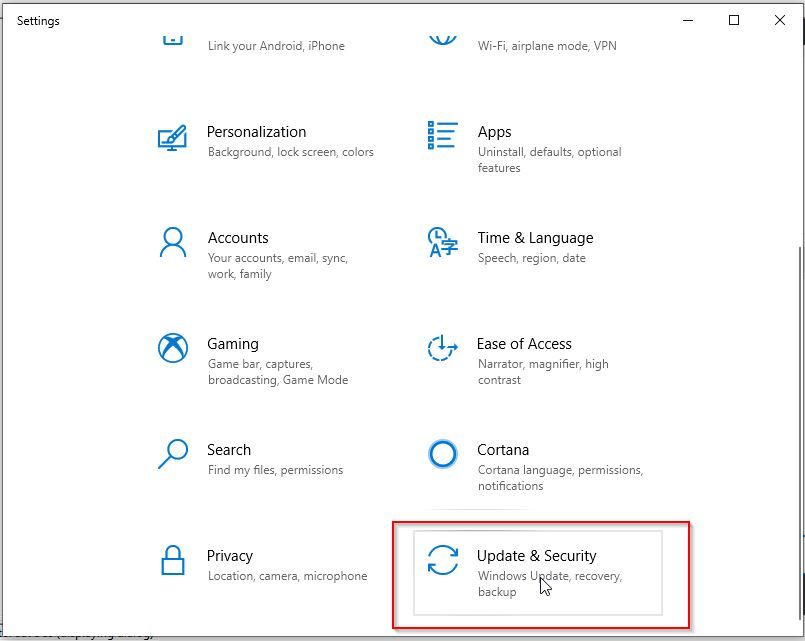
- Now click on View Update History
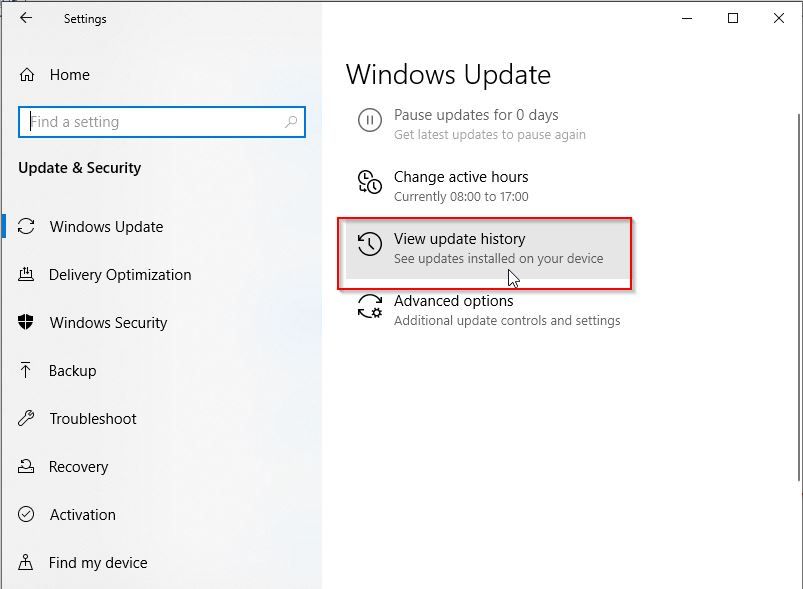
- Then copy the recent KB number of the Windows Update package.
- Next, go to Microsoft Update Catalog (catalog.update.microsoft.com) website and Paste the KB number in the search box and press Enter
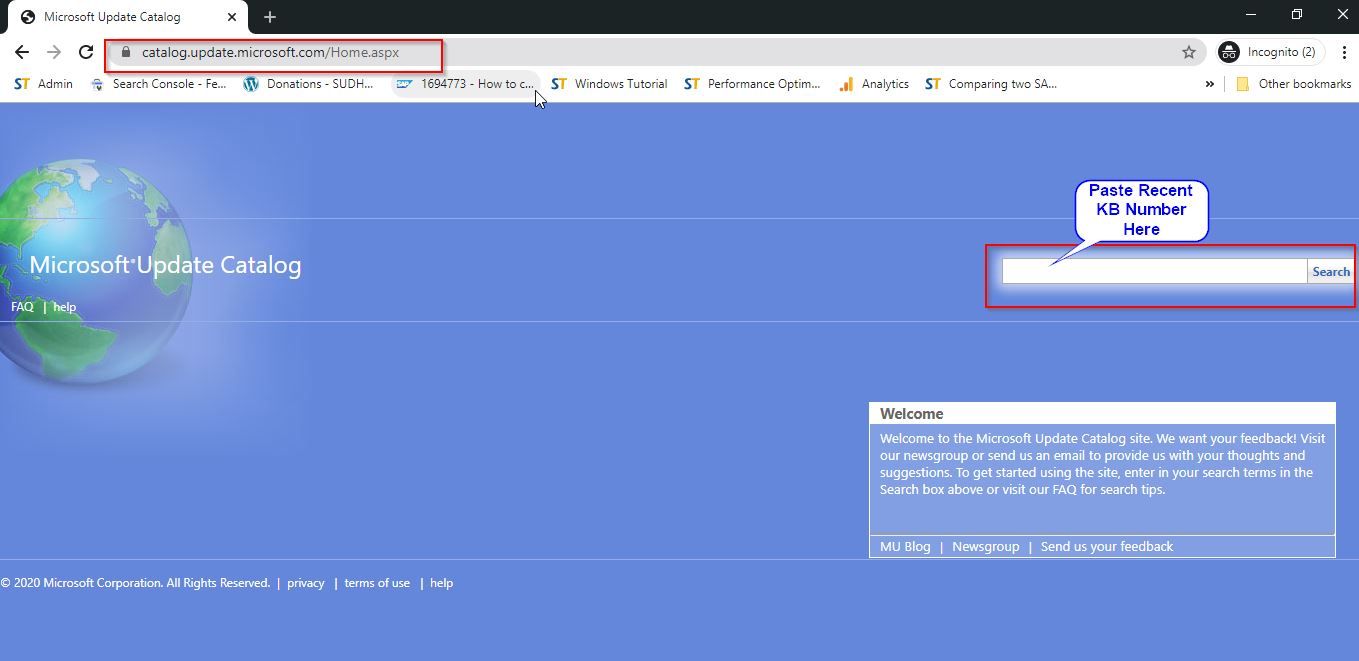
- Click on Download. In the pop-up that appears, click on the .msu file link to download the update
- After downloading the file, install it
Method 7: Running the Windows Update Troubleshooter
You can always run the built-in Windows Troubleshooter, to handle problems like installing updates.
Please follow the steps below -
- Go to the Window Search Bar, type Troubleshooter Settings and Press Enter
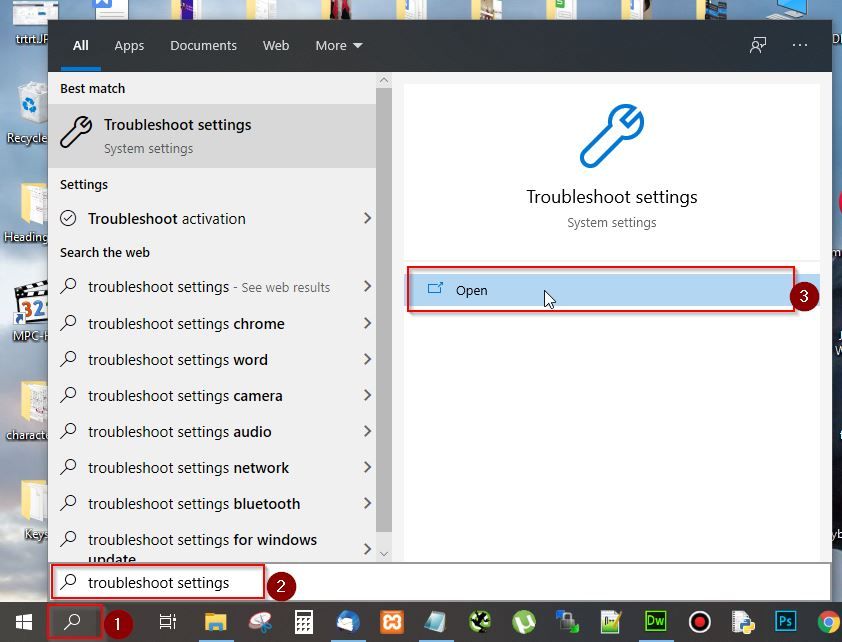
- Next, click on Window Update and then select Run the Troubleshooter
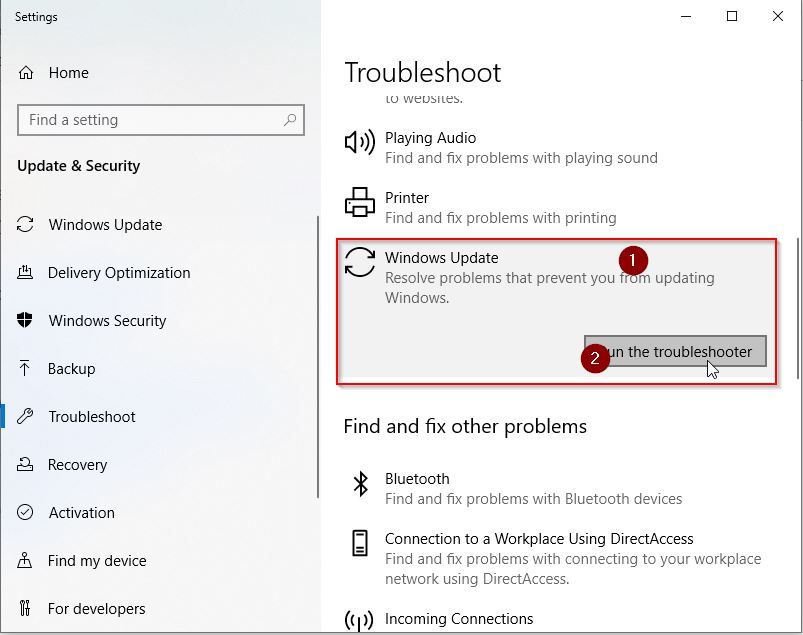
- Follow the instructions popping up on your screen to complete the process of troubleshooting.
Now boot up your system again to see whether Windows is able to update properly.
Method 8: Upgrade the Version of Windows 10
If the above methods didn’t resolve the issue, then you can upgrade the Windows 10 Feature update to the latest version (Currently Feature update version 1909).
Please follow the steps below -
- Go to Window Search Bar, type in Setting and click Open or press Enter
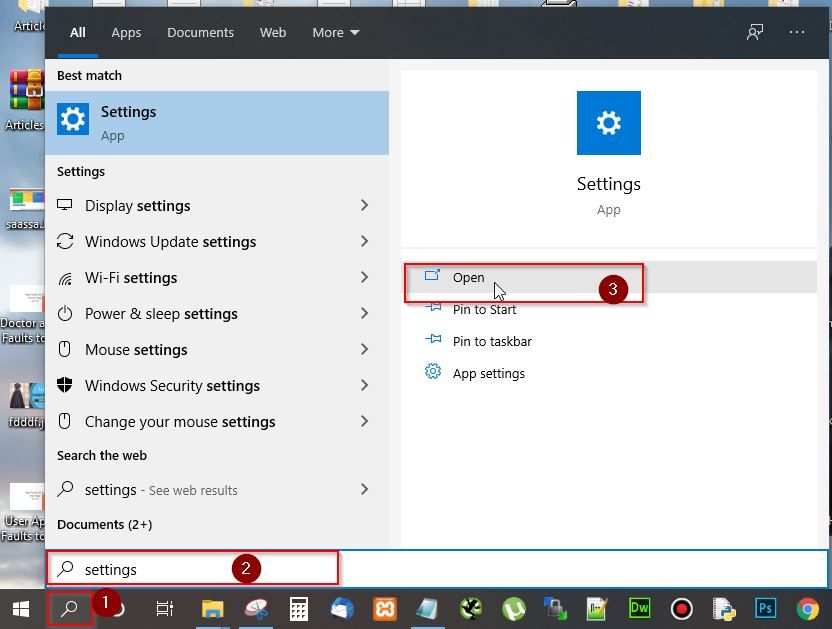
- Next, scroll down and click on Update & Security
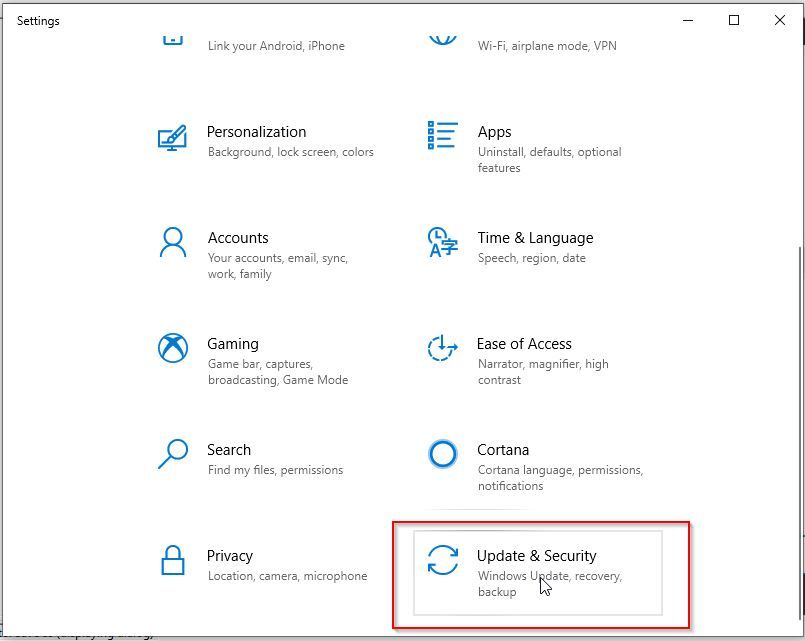
- Next in Window Update tab go to “Feature update to Windows 10, version 1909” and click on Download and install now
- Once the download is completed, the system will automatically start the installation
Now Restart your system and navigate back to Search Menu > Settings > Update & Security > View Update History to check if all the updates have been successfully installed.
Method 9: Restart Windows Update Services
The “We couldn’t install some updates because the PC was turned off” error may occur due to the ny and .dll files of the Windows Update. These files may not be registered, and you need to fix this.
Therefore, go to the Service Manager and Restart the following Windows Update Services –
- Background Intelligent Transfer Service
- Cryptographic Services
- Window Update
Please click here for step by step process –
(https://www.stechies.com/windows-update-service-not-running-error/#8)
Method 10: Update all Drivers
If all the methods described above fail to prevent the error, you can try updating all drivers. This is because the outdated drivers of your system may be causing troubles in the Windows Update Service.
Steps to update device drivers –
- Search for Device Manager in the search box on your taskbar
- Once inside the Device Manager, right-click to select any device such as Bluetooth or Disk Drives
- Click on Update driver to update the device driver software
Conclusion
We hope the methods mentioned above will help you get rid of the “We couldn’t install some updates because the PC was turned off”. Apart from keeping your PC charged during the update, make sure the internet connection is stable.
