How to Add Facial Hair in Photoshop?
Things you need to cosider or keep in mind before creating facial hair in photoshop is that it’s not all the same colors, there are some dark colors close to black and there are some colors close to brown. So, you need to add all these variations to the brush.
To create facial hair via Grass brush tool, please follow the steps below:
1) Select the Image on which you want to grow facial hair.
2) Select brush tool and select Grass Brush.
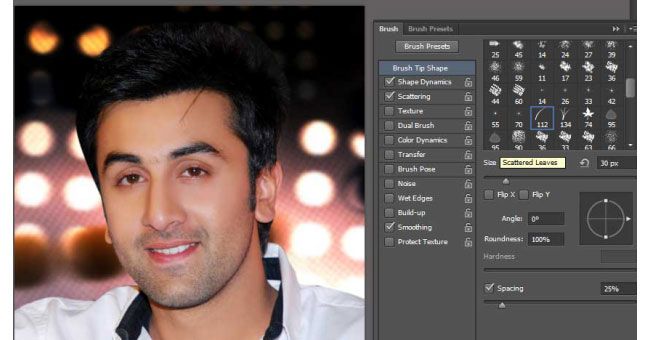
3) With 'Eyedropper' tool please choose the color of the hair.
4) Click on 'Brush Settings'
5) Setting of Shape Dynamics:
- minimum Diameter :0%
- Angle Jitter: 15
Leave other settings as default
6) Scattering Settings
- Scatter: 150%
- Count: 5 (To make a thicker Beard )
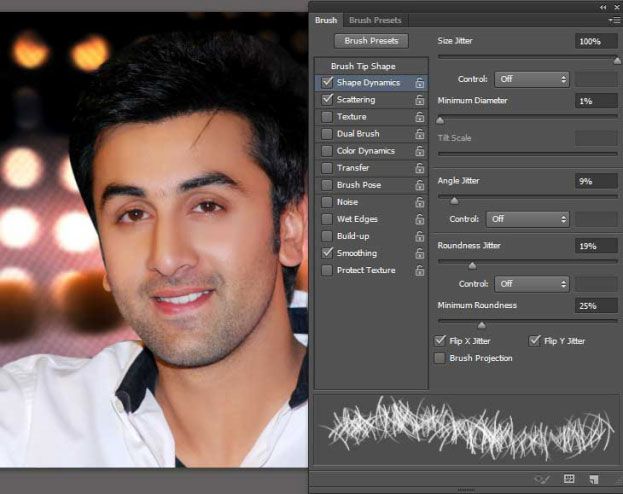
7) Now click on the 'Size Dynamics' again and select 'Flip X 'Jitter and 'Flip Y' Jitter that will flip some of the hair created using the new brush. You can adjust the spacing to increase or decrease the density of hair. Now create a new layer on the top of you Picture.
8) Now start filling the face with facial hair at your desired location using the grass tool brush. To add color variations just sample a part of the facial hair and use that color.
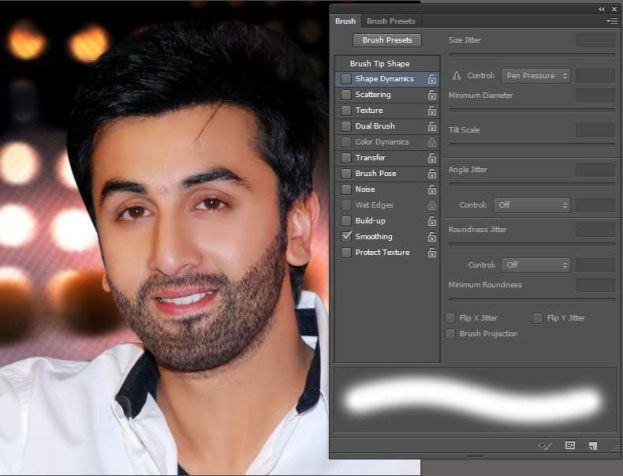
9) Draw the hair in the direction in which hair naturally grow to get a more realistic effect. You can also change the brush size if you want to create a different kind of facial hair, like stubble. Finally, you get a different facial hair after Photoshop.
10) You can add more facial hair to make any further changes in the facial hair style. You can also take more color samples and highlights and use them to make it more realistic.
At the end select Eraser tool and erase unwanted facial hair from face.
Read Next: Create Facial Hair with Simple Brush Tool