This SAP SCM Extended Warehouse Management tutorial, explains to the users the step-by-step procedure to define a Putaway Control Indicator in the SAP system with proper screenshots of every step performed.
What is Putaway Control Indicator in SAP?
A putaway control indicator is defined in SAP SCM in order to ensure that specific products are placed in specific storage types as instructed by the system.
How to Define Putaway Control Indicator in SAP?
Please follow the steps below to define the putaway control indicator in your SAP system:
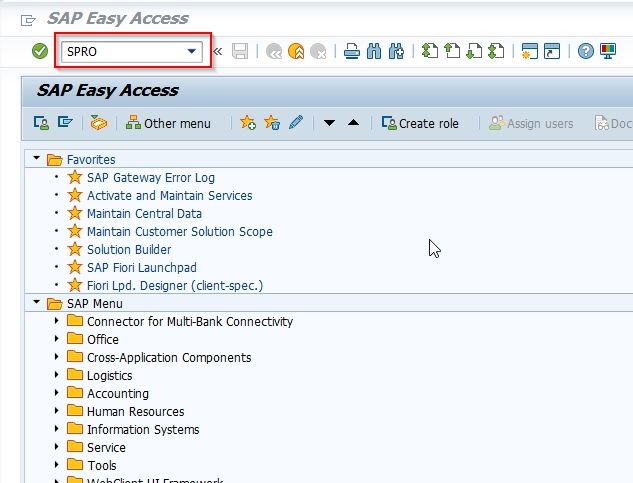
Enter t-code SPRO in the SAP command field and press Enter to execute the transaction code.
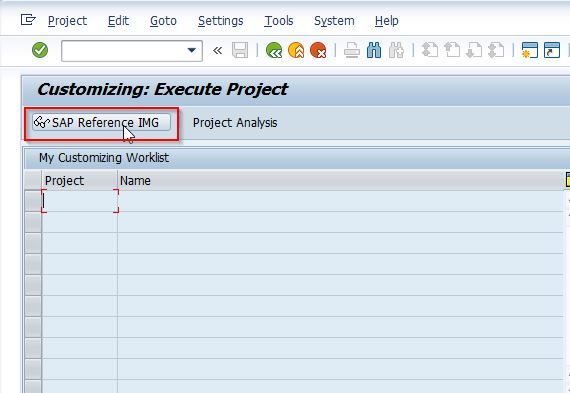
On the next screen click the SAP Reference IMG button to proceed to the next steps.
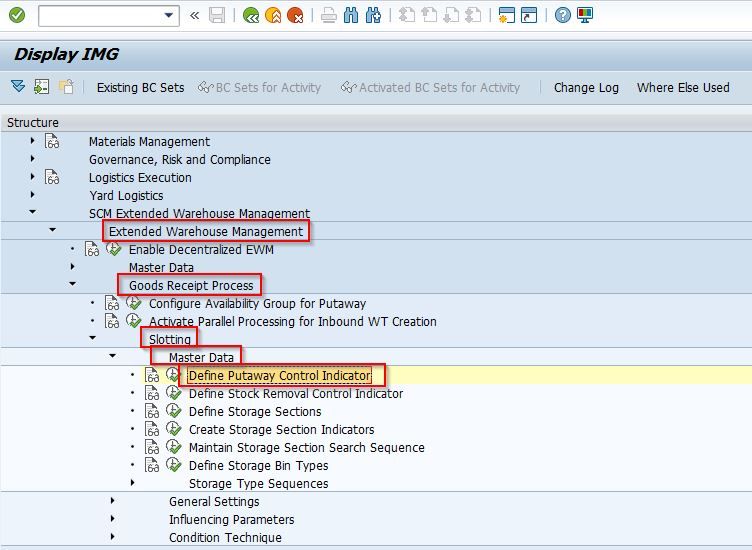
Now navigate to the following SAP IMG path:
SPRO > SAP Reference IMG > SCM Extended Warehouse Management > Extended Warehouse Management > Goods Reciept Process > Slotting > master Data > Define Putaway Control Indicator
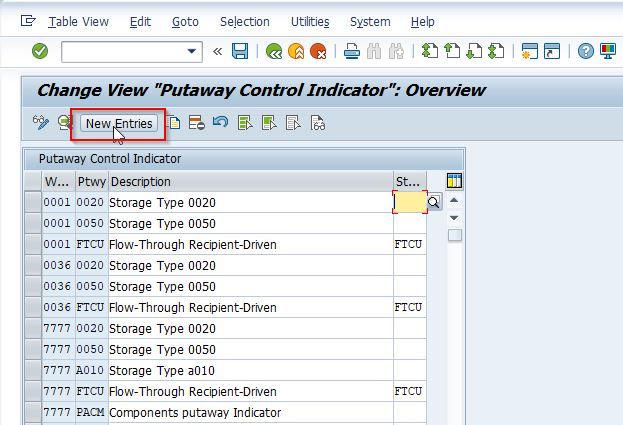
Next on the Change View "Putaway Control Indicator": Overview screen you will see a list of all previously defined Putaway Control Indicators on your SAP system.
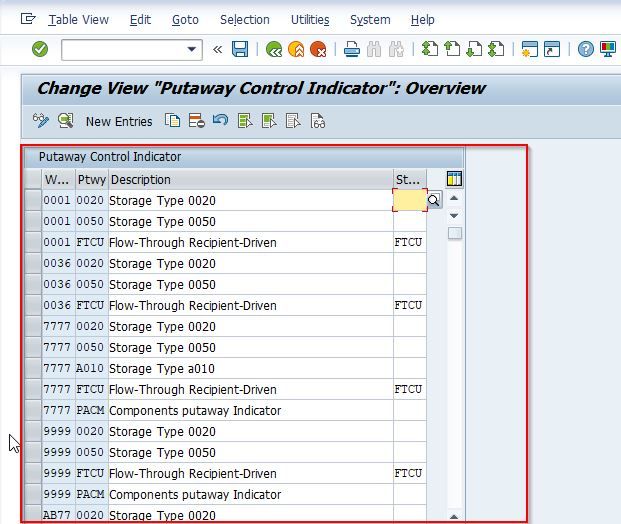
Next, click the New Entries button to define a new putaway control indicator as shown in the image below.
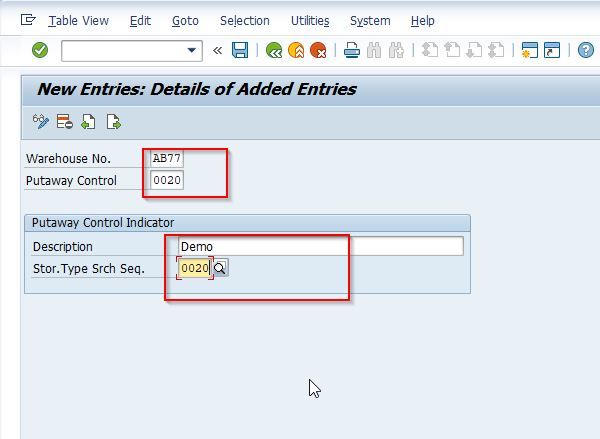
Now on the screen enter the following fields for the new putaway control indicator:
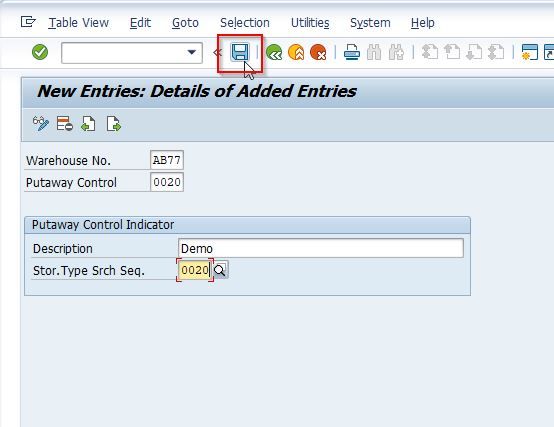
Once all the details have been entered click the Save button to save the new putaway control indicator.
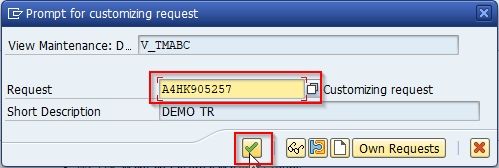
Now select your Customization Request id and press Enter to go to the next screen.
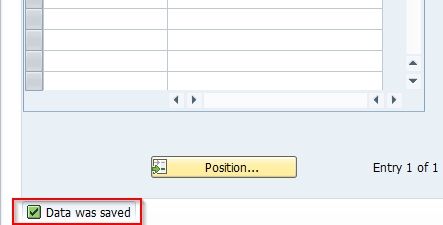
Next, the message Data was saved will be displayed at the bottom of your screen implying all the details for the new putaway control indicator have been saved in your system.
You have successfully defined the new Putaway Control Indicator on your SAP system.