IIS is short for Internet Information Service, which allows programmers or users to exchange static and dynamic web content with end-users. It is a flexible and general-purpose web server by Microsoft running on the Windows operating system.
Users can easily host, manage and deploy web applications to serve requested HTML pages or files. But before using the IIS server, users must install it on the Windows system.
This article will provide all the necessary steps which will guide you to install the ISS server on Windows 2012 and 2016.
What is an IIS server?
As we have discussed, an IIS server is an extensible web server by Microsoft to make sharing and delivering of information across LANs and WANs efficient. It uses different protocols for communication and accepts and responds to the client's computer requests using HTTP, SMTP, and FTP.
Follow the steps below to download the IIS server on Windows 2012 and 2016:
Step 1: Open the Start page and go to Server Manager.
Step 2: Go to the navigation pane, and click on Dashboard.
Step 3: Click on Add roles and features.
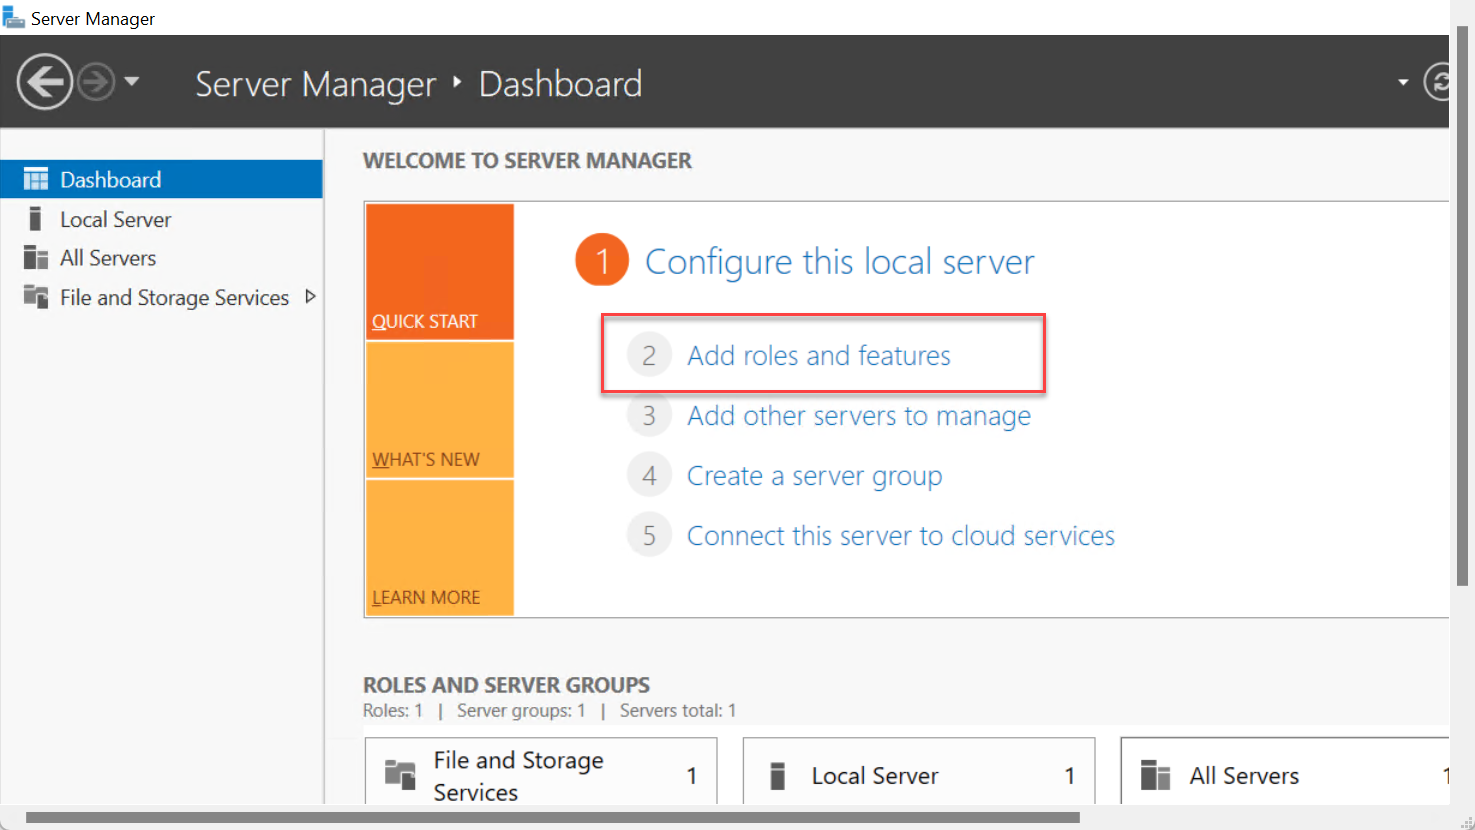
Step 4: Go to the Add Roles and Features Wizard >> Before You Begin page, and click the "Next" option.
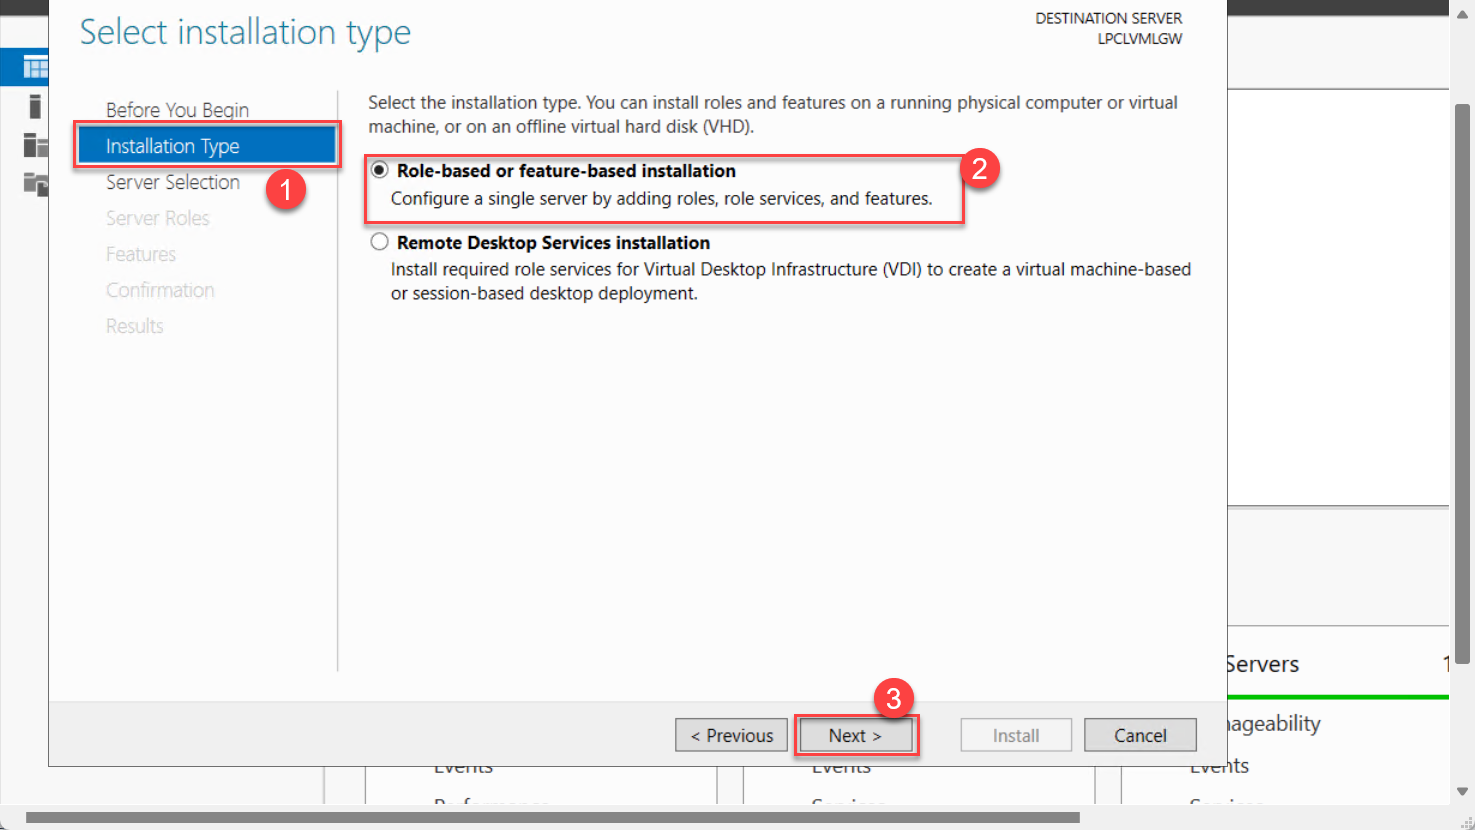
Step 5: It will direct users to the Select Installation type page, click on Role-based or feature-based installation and then click the “Next” button.
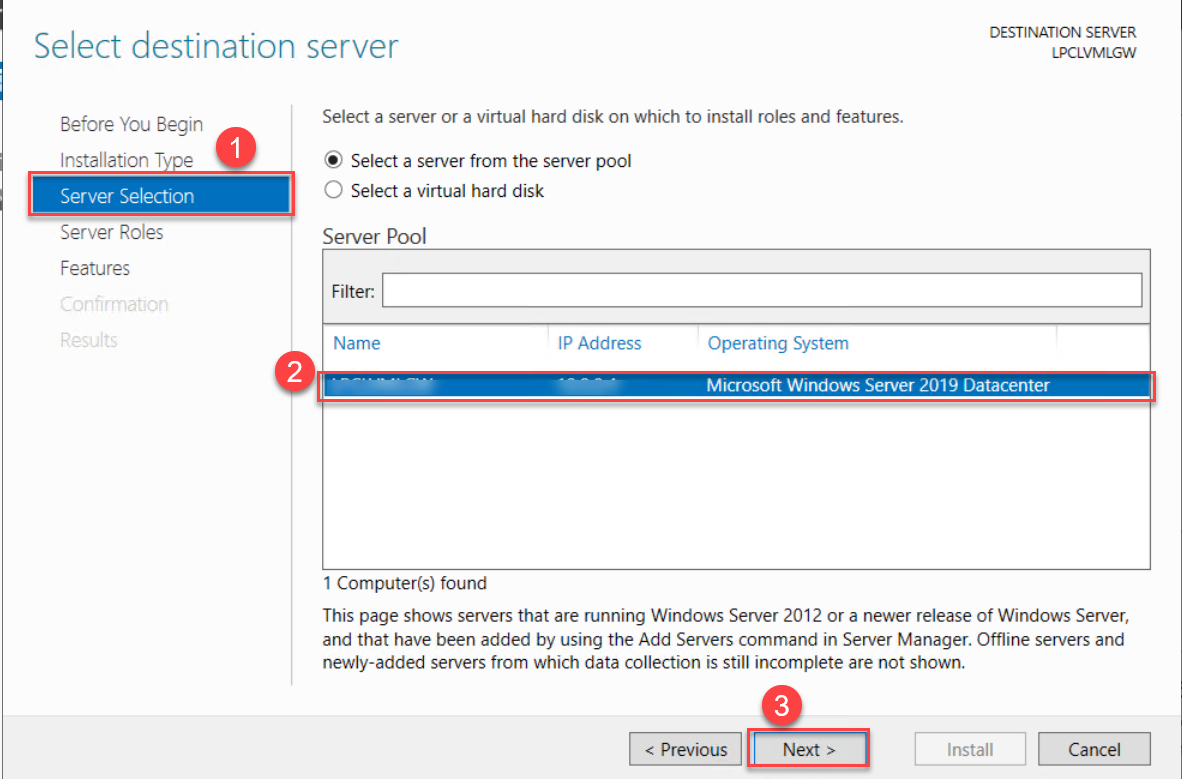
Step 6: The above step will direct users to the Select destination server page where they need to click on the Server Selection >> Select a server from the server pool and users can select a server from the Server Pool list.
Step 7: Click the Next option.
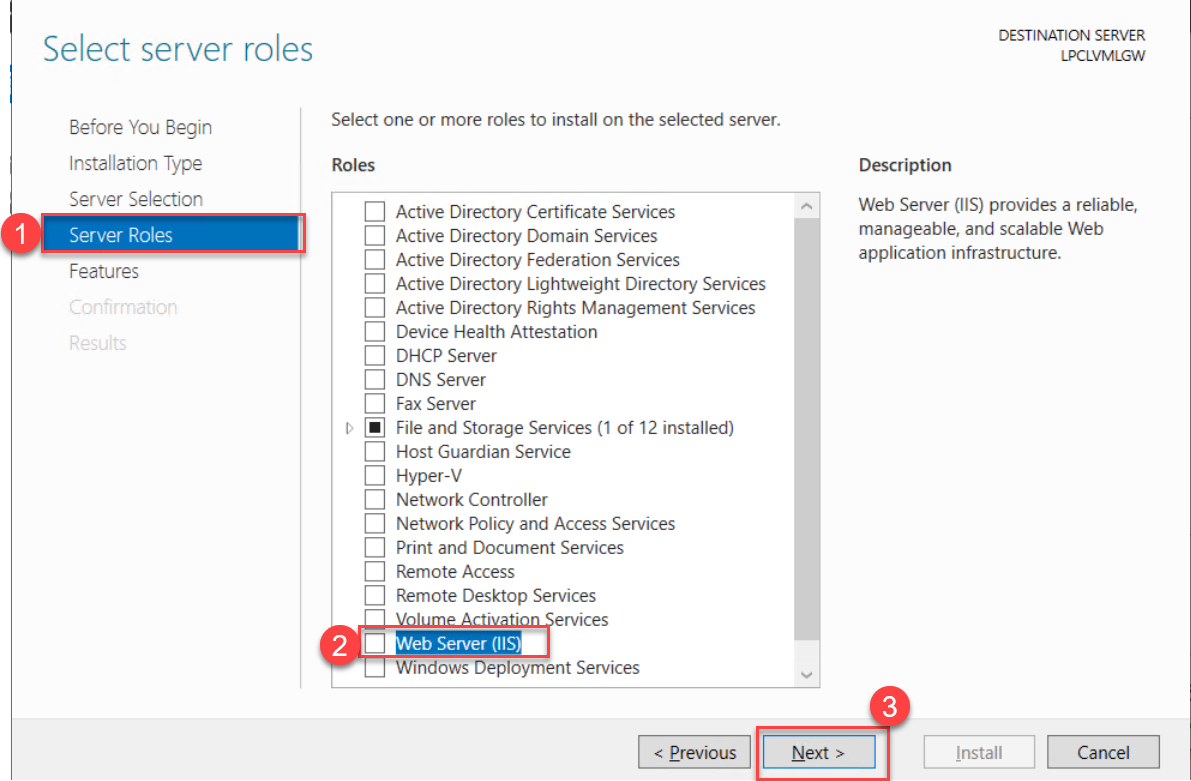
Step 8: Go to the Select Server Roles window, click the Web Server (IIS) option, and click the Next button.
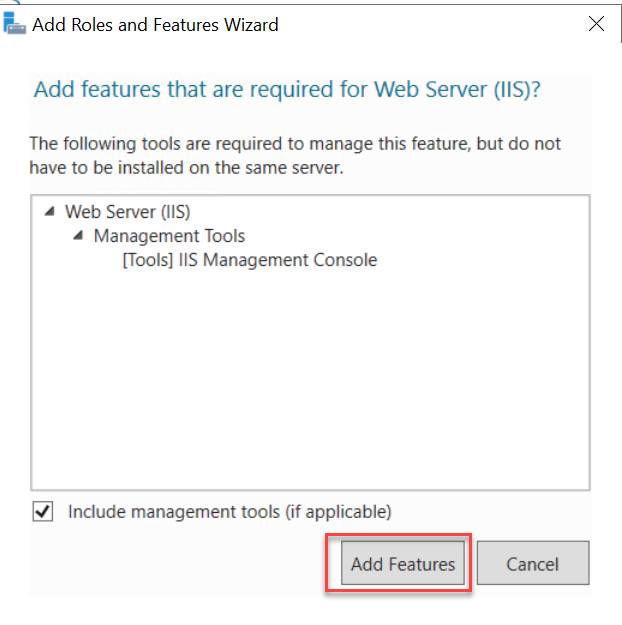
Step 9: In the Add Roles and Features Wizard, users will find “Add features that are required for Web Server (IIS)” dialog box that appears on their screen, and then select Add Features.
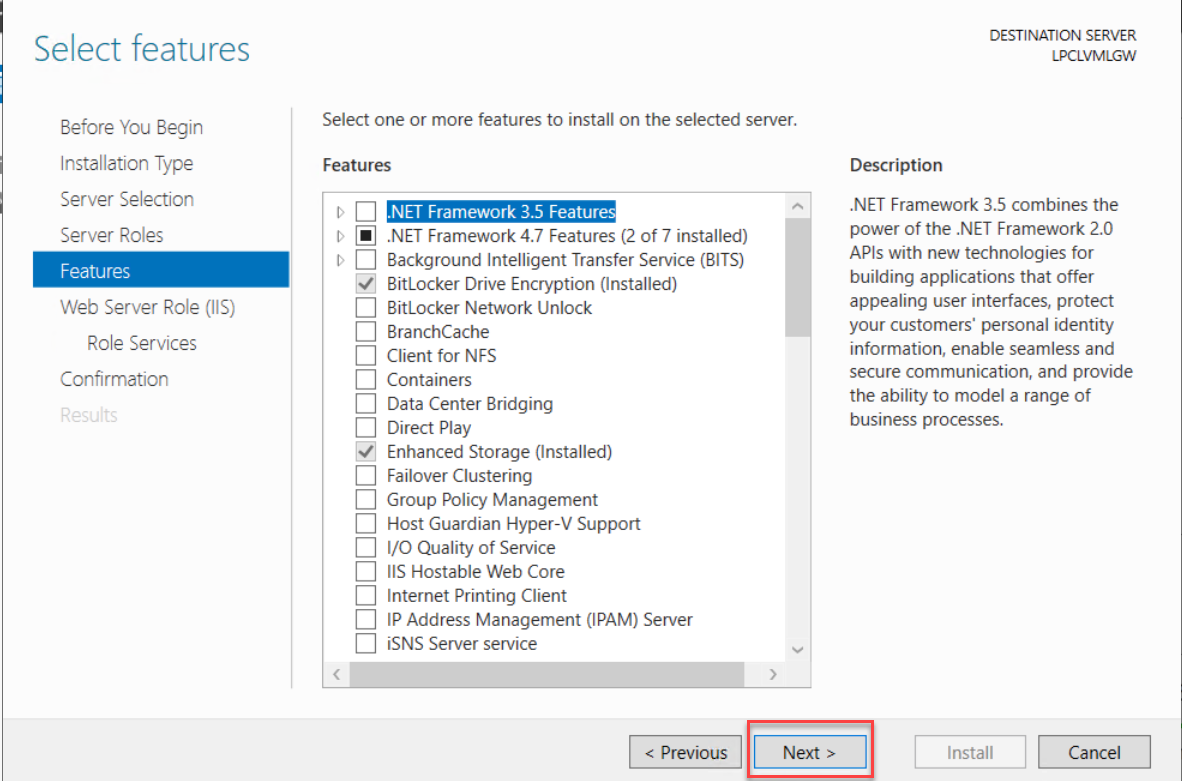
Step 10: In the Select features page, click the "Features" option, and users will see .NET Framework N.NN.
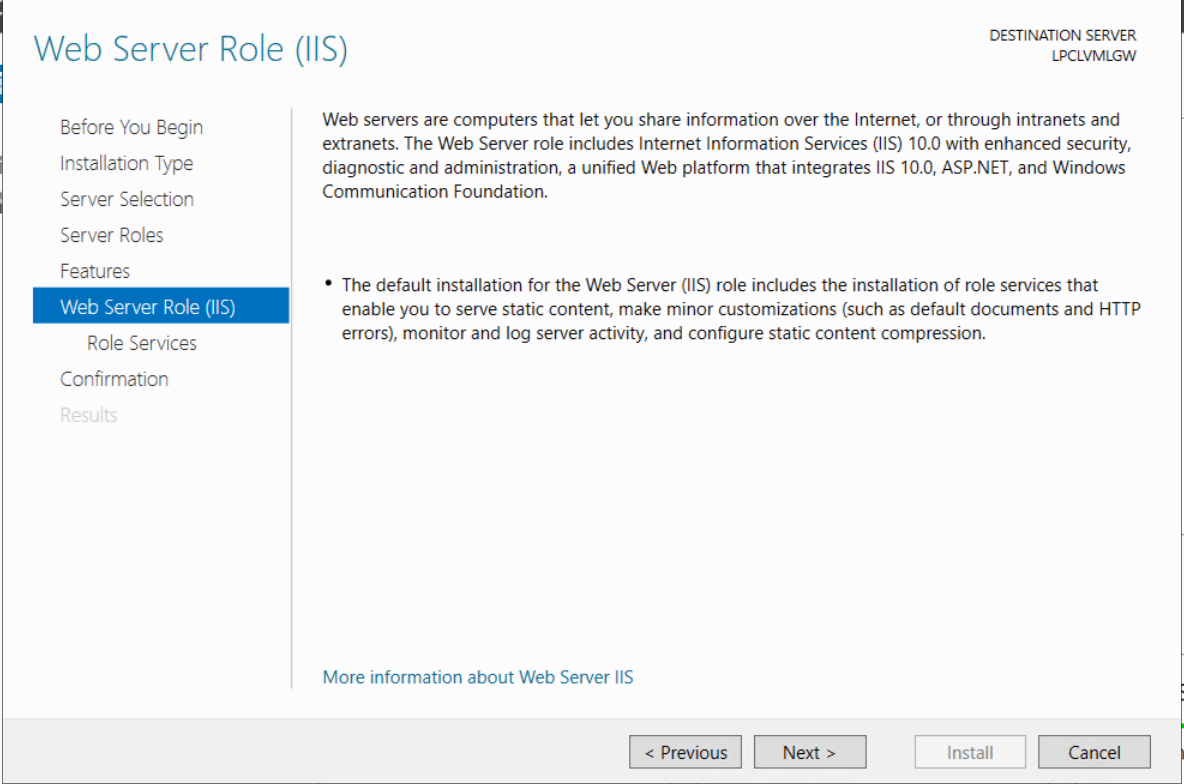
Step 11: Users will find the Web Server Role (IIS), go to Web Server Role (IIS) and click “Next.”
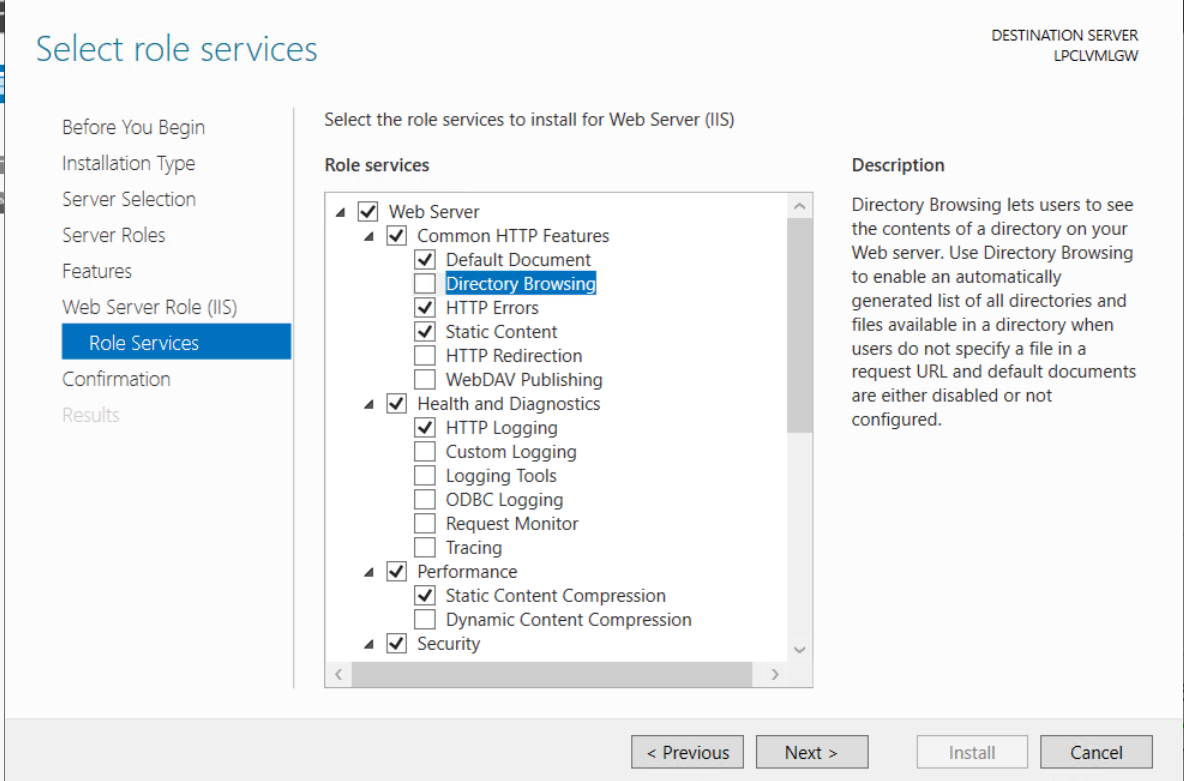
Step 12: In the Select features page, click the "Features" option, and users will see .NET Framework N.NN.
Then, this will proceed to the next page. i.e., select role services page, where users need to verify that they have these following role services pre-selected at a minimum.
Under the Common HTTP Features
- Select Default Document
- Select Default Browsing
- Select HTTP Errors
- Select Static Content
Under the Application Development
- Select .NET Extensibility 3.5 (if users have installed the .NET Framework 3.5)
- Select .NET Extensibility 4.5, 4.60, or 4.70
- Select ASP.NET 3.5 (if users have installed the .NET Framework 3.5)
- Select ASP.NET 4.5, 4.60, or 4.70
- Select ISAPI Extensions
- Select ISAPI Filters
Under the Security option
- Select Request Filtering
- Select Windows Authentication
Under the Management Tools
- Select IIS Management Console (it is optional)
Then click on Next.
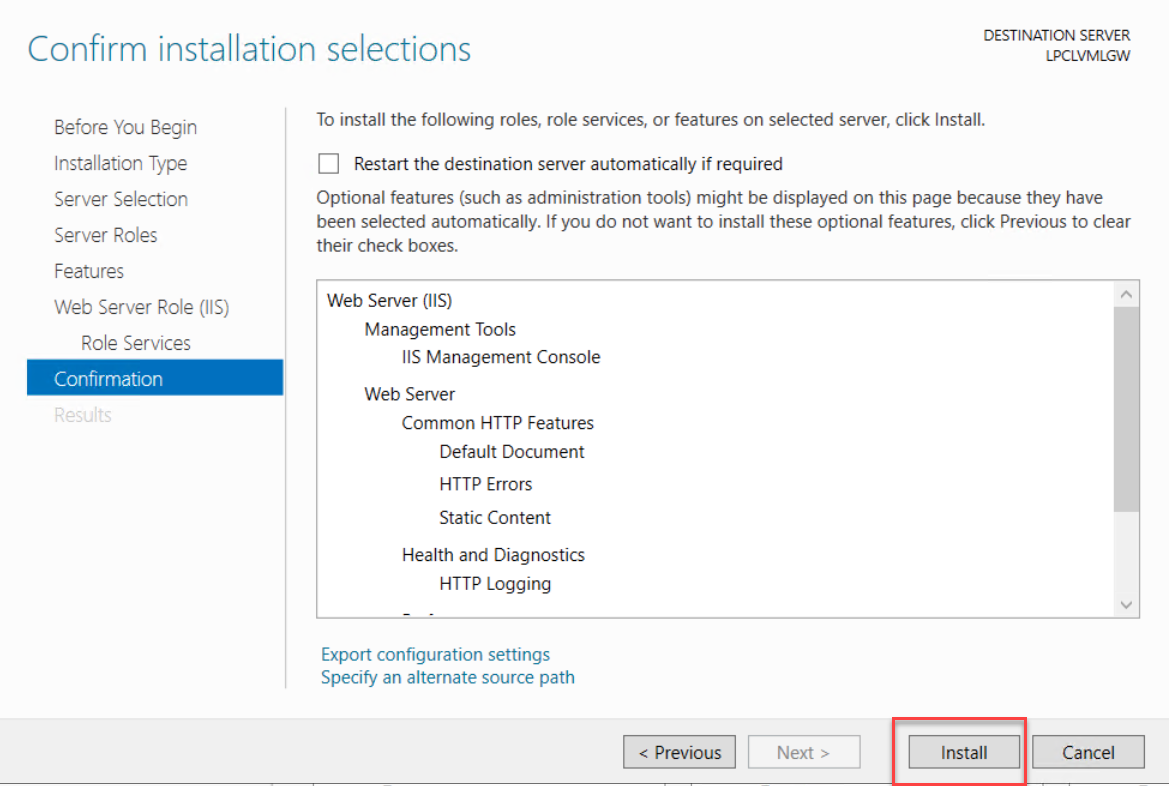
Step 13: After this, users go to the Confirm installation selections page, click on Confirmation and select the Install button.
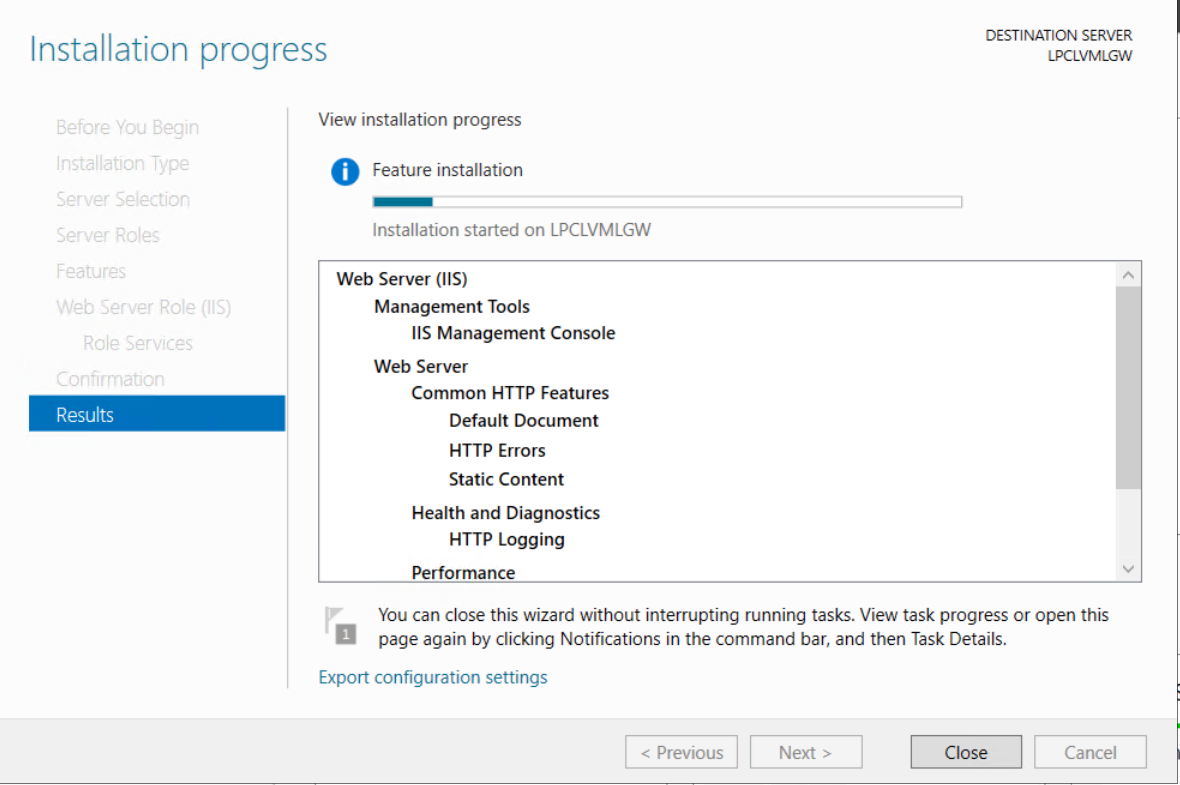
Step 14: Then, on the Installation progress page, users verify that their installation finished successfully and click the Close option.
Step 15: Users have to start their browser to verify that they got the web server installed correctly. Then type https://localhost in the address.
Step 16: It will open the default website, which should display an IIS image.
Conclusion:
We hope you successfully installed the IIS server in Windows 2012 and 2016. Even today, IIS is one of the prevalent choices for several web application hosting services or web developers. It is because of the reason that the IIS server provides different features, and programmers and users can integrate this with other Microsoft products.
This article also caters to what IIS is, how it works, and a deep-dyed step-by-step procedure to configure IIS on the Windows server.