In this article, you will learn how to install MAC on VMware. VMware is a cloud computing and virtualization software tool for Windows operating systems that allows users to install a virtual operating system within their windows operating system.
But when a user wants to use MAC on windows virtual machine, they need to install it, and it is the perfect way to use Mac-only apps on Windows.
Requirements that a user needs to create a macOS virtual machine on windows:
1. Users need to install VMware 16
2. They should have pre-installed Unlocker for VMware
3. Download macOS Catalina ISO 10.15.7
Download MacOS Catalina ISO 10.15.7.
Or search on google for latest “Unlocker For VMware”
- Stop VMWare if running
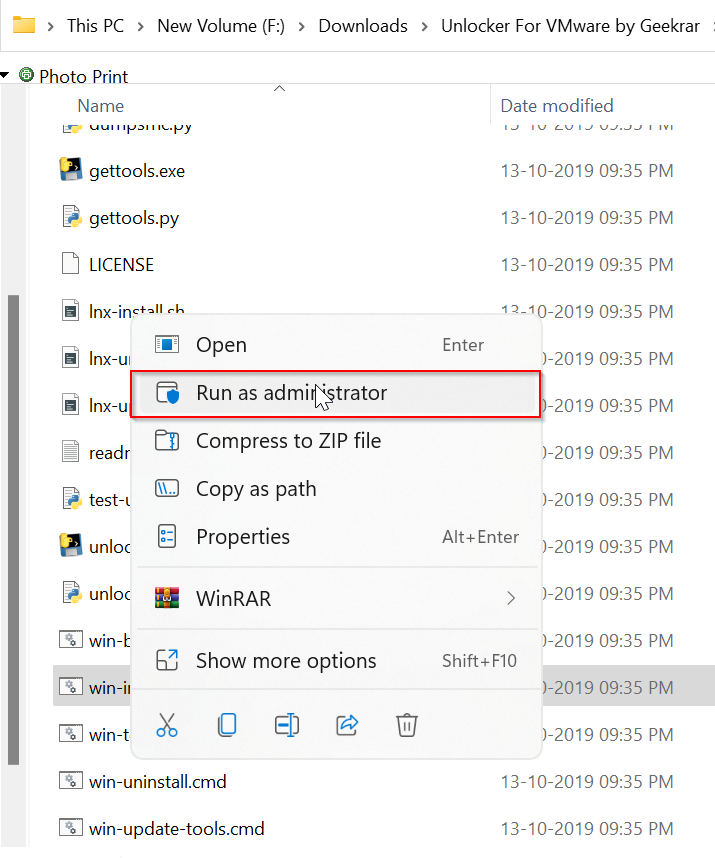
- Run win-install.cmd file as Administrator
Steps to install MAC on VMware:
- Install Unlocker For VMware
- Create New Virtual Machine
- Check Virtual Machine Settings
- Start Virtual Machine & Install MacOS 10.15
Step 1: Install win-install.cmd. It will install the required patch for VMware.
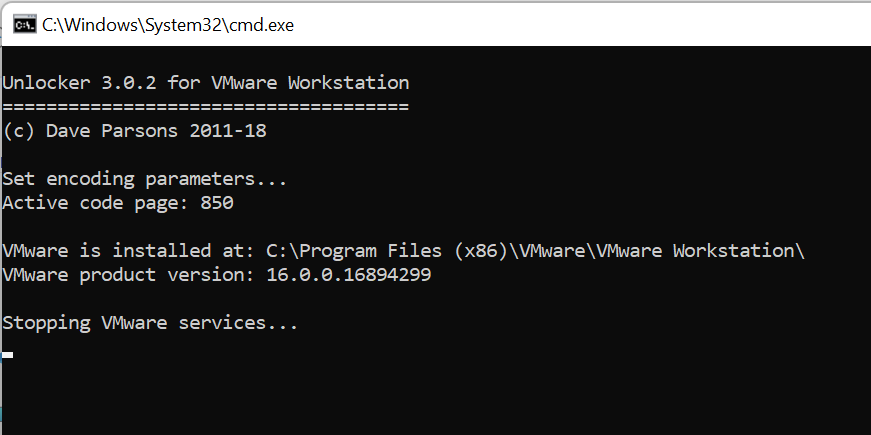
It successfully installs a patch for VMware.
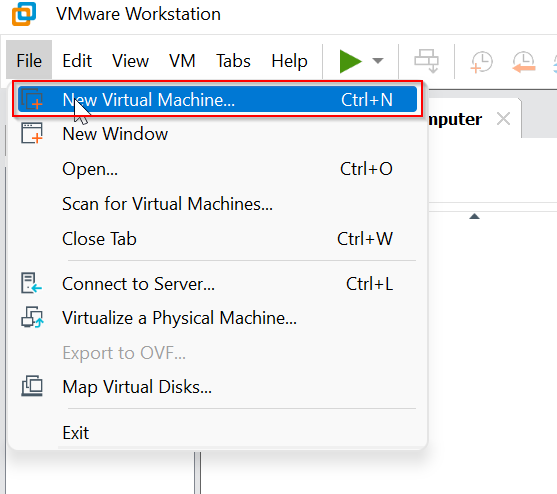
Setp 2: Create New Virtual Machine
Open the VMware machine and click on the “New Virtual Machine” option.
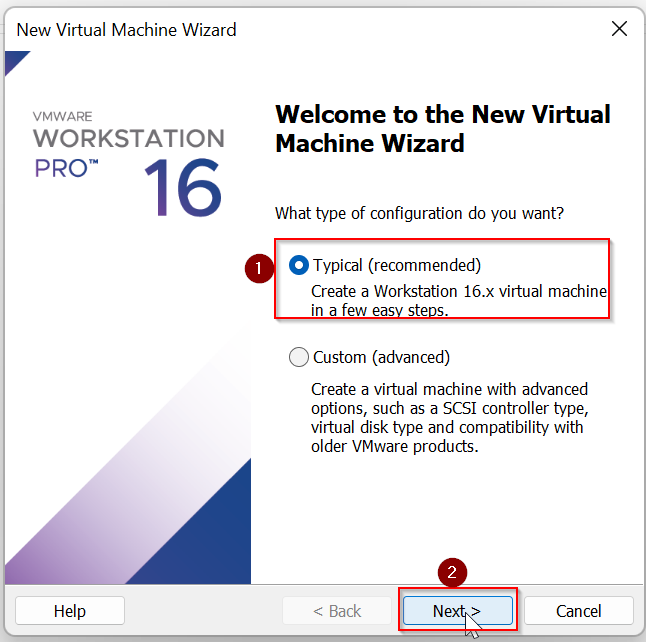
Here, one can see the home page of the VMware application.
- You can see the option "What type of configuration do you want?" and select the option "Typical (recommended)."
- Click on the Next button.
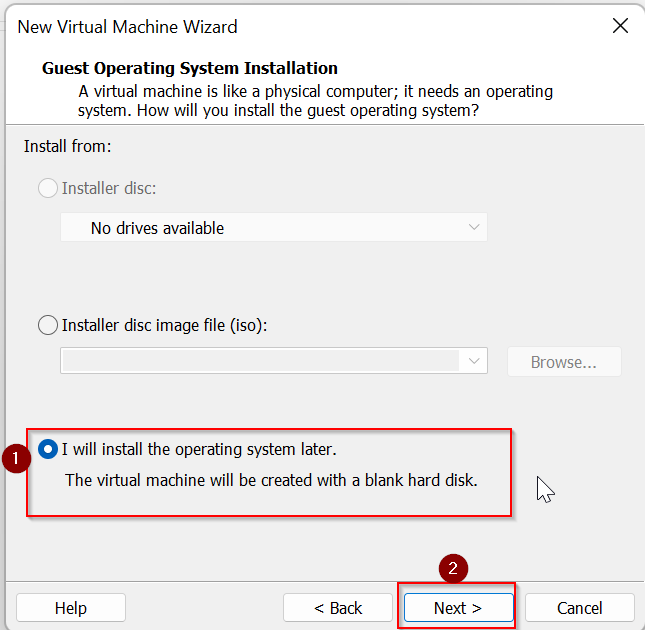
On the next page of the New Virtual Machine Wizard, the option "I will install the operating system later" and click “Next.”
Proceed by clicking “Next.”
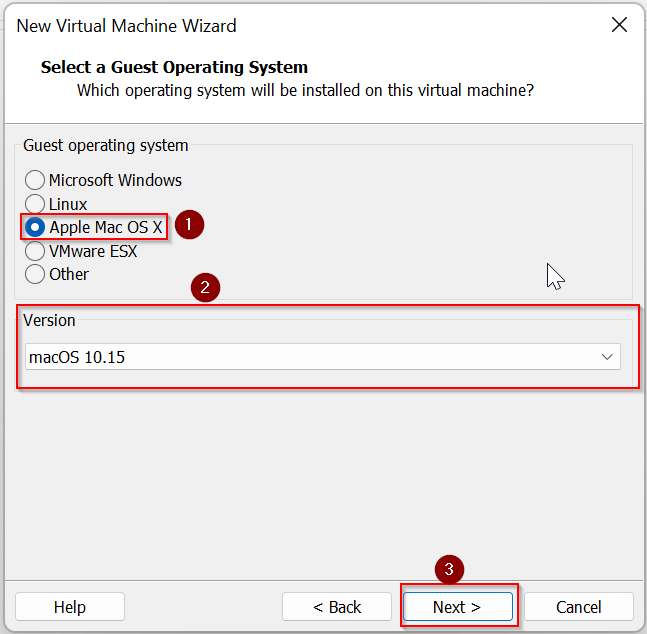
Go to "Select a guest operating system" and select "Apple MAC OS X."
Then, users need to set the virtual machine name with something they can memorize and yet easy to type. They need to insert the name in the series of commands. They must use a simple name as they have to add this Virtual Machine name multiple times. It will make the process easier.
Select the location where you want to install and click on the "Next" button.
The most important thing to note is users cannot set more RAM than their system has, and they need to leave a little memory space available for the host operating system.
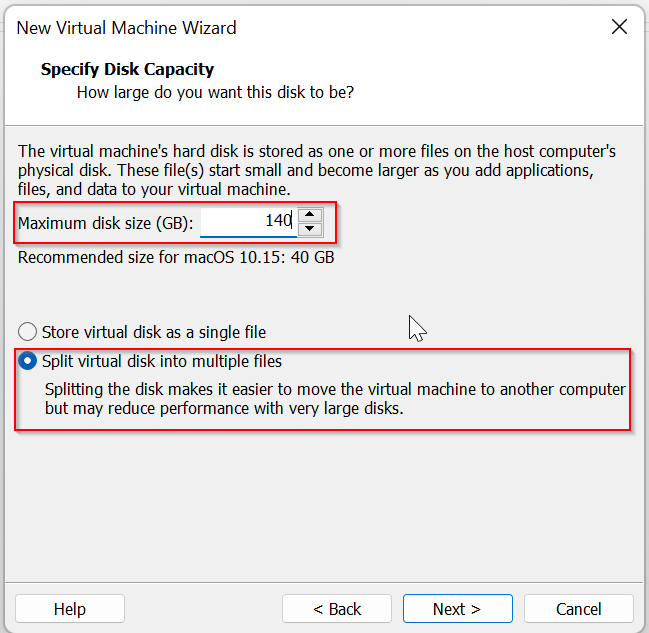
The next step specifies the disk space for the virtual machine. Now, go to the "Specify Disk Capacity" and set the maximum disk size. Proceeding to the subsequent screen, click "Virtual Hard Disk," and assign the size of that hard disk to a minimum of 50GB.
But, same as the RAM size, if users leave more space than 50GB, they can have a better experience. MacOS Catalina needs a storage space of at least 35GB.
Users need to install Xcode, which is why they need more space.
Now click on “Customize Hardware” because we need to install XCODE, so users need to increase RAM.
Click on the “Finish”

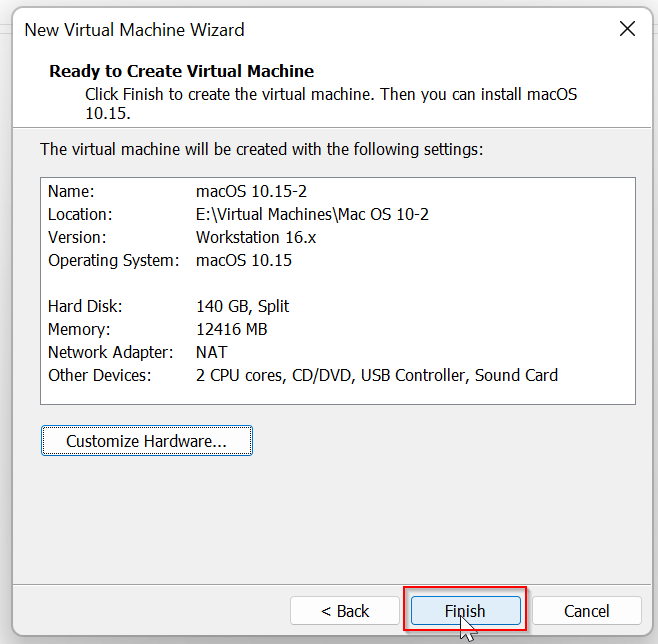
Now the Virtual Machine is ready for installation.
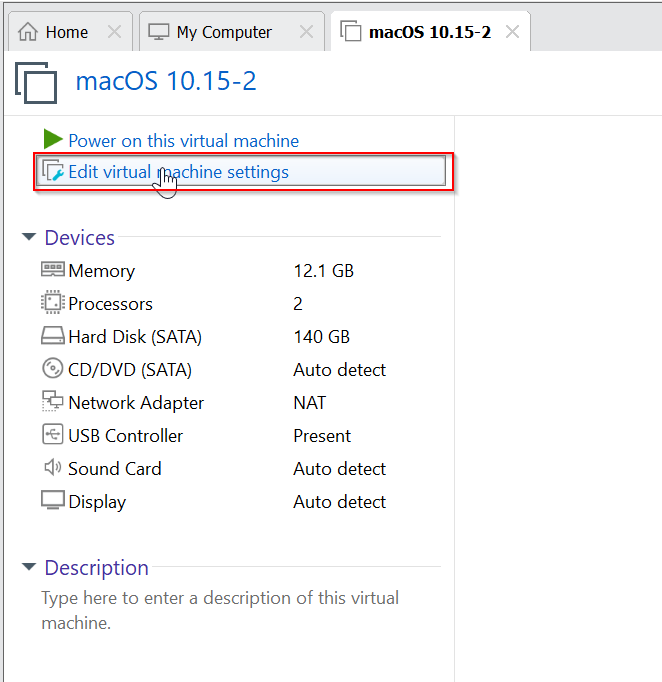
Step 3: Check Virtual Machine Settings
Go to "Edit Virtual Machine Settings," and from here, they can edit the virtual machine for the installation.
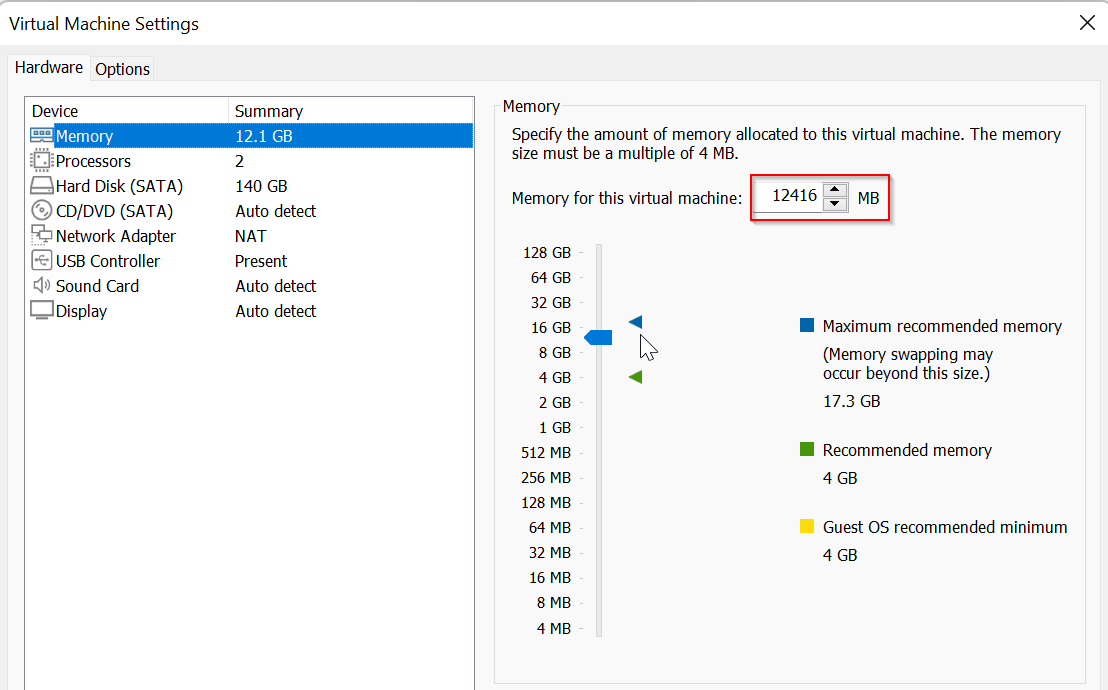
Proceeding to the next setup, users need to specify the amount of RAM the macOS virtual machine they will use. As per the expert's suggestion, the appropriate amount of RAM is a minimum of 4GB. But the more a user will provide from the host system, the better they will experience. Set the RAM storage to 12GB.
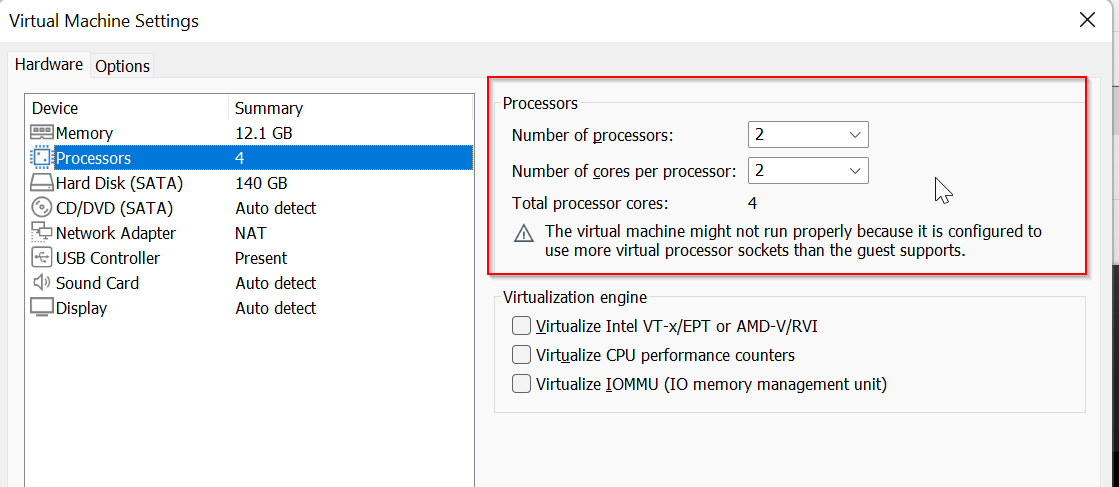
Then, click the "Processor tab" and set the processor to four cores. If users have a CPU with a capacity to spare, such as an i9 with multiple extra cores or an Intel Core i7, consider allocating more processors.
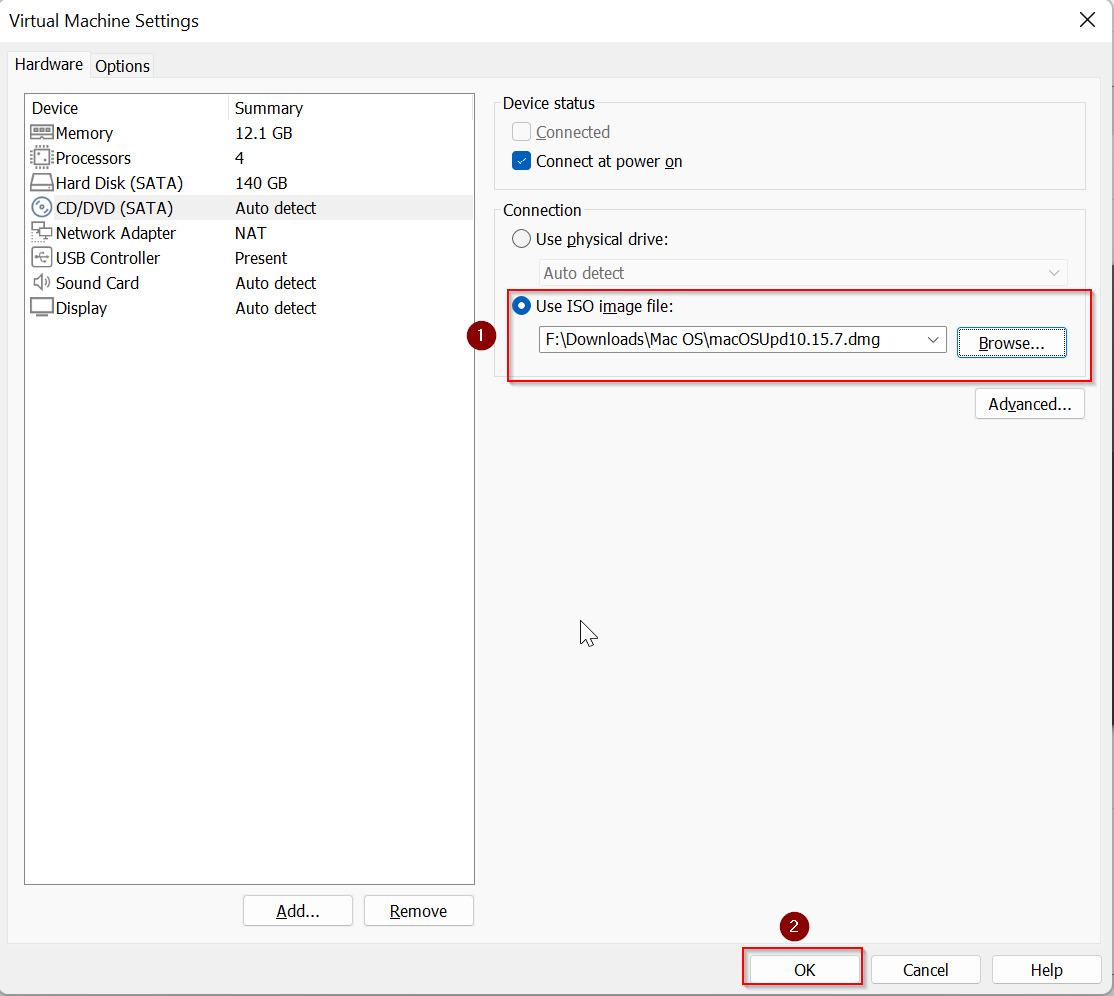
Select the "CD/DVD (SATA)" as auto detect.
In the Device status section, Then go to Connection and use one ISO image file. Click on Browse after setting the image and then OK.
Step 4: Start Virtual Machine & Install MacOS 10.15
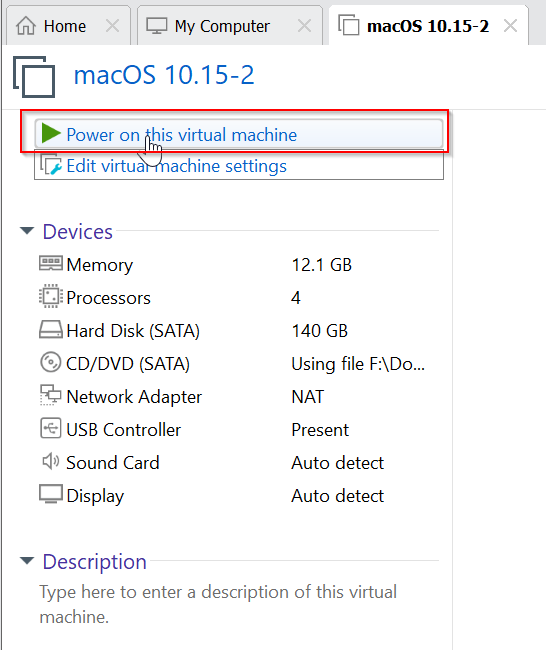
Then again, go to "Edit Virtual Machine Settings," and from here, click on "Power on this virtual machine."
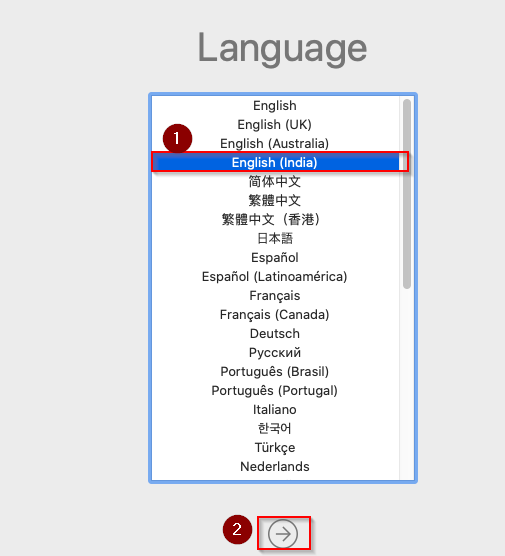
Open the VirtualBox again by double-tapping the virtual machine. After opening the VirtualBox, users will see a long series of texts with an Apple logo on any side. Proceeding to the next screen, choose the desired language, and click the arrow button below.
In the next step, go to "Disk Utility," and to install it, users need to create a clean drive for macOS Catalina.
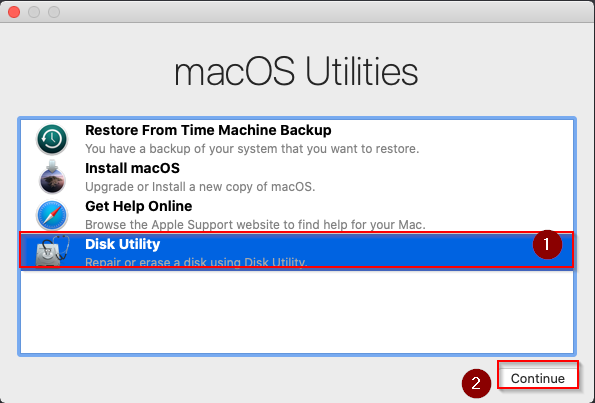
Open the Disk Utility, and click "VMware Virtual SATA" from the Internal drive column.
After choosing the drive, go to the "Erase" option at the top of that utility option.
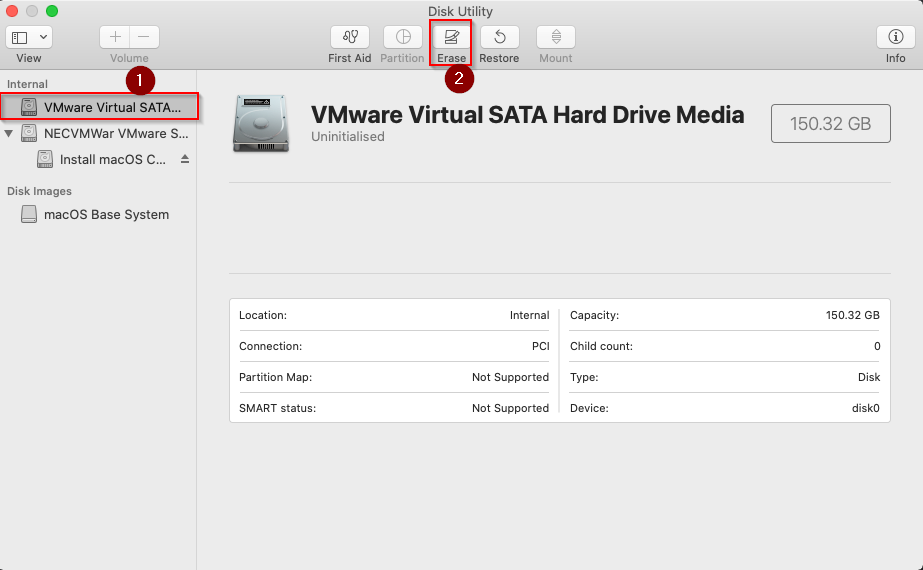
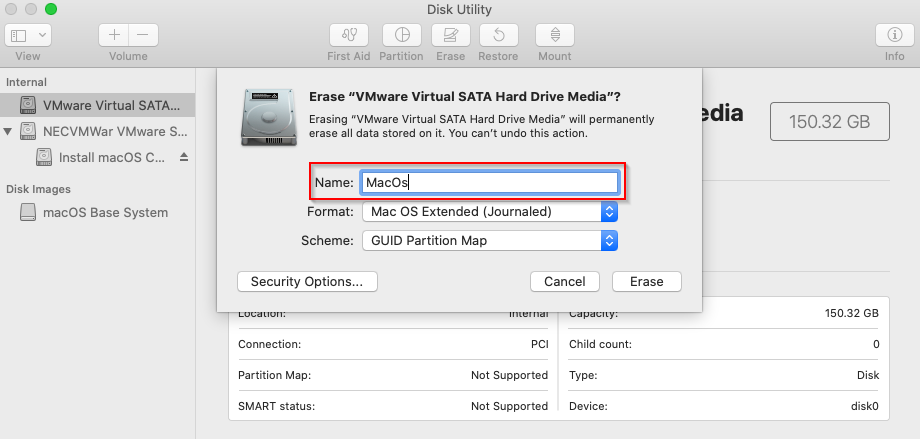
Users then need to set the name of their drive. Then, assign the format to Mac OS Extended (Apple File System, APFS) Journaled and the "Scheme" to GUID Partition Map.
Click "Erase."
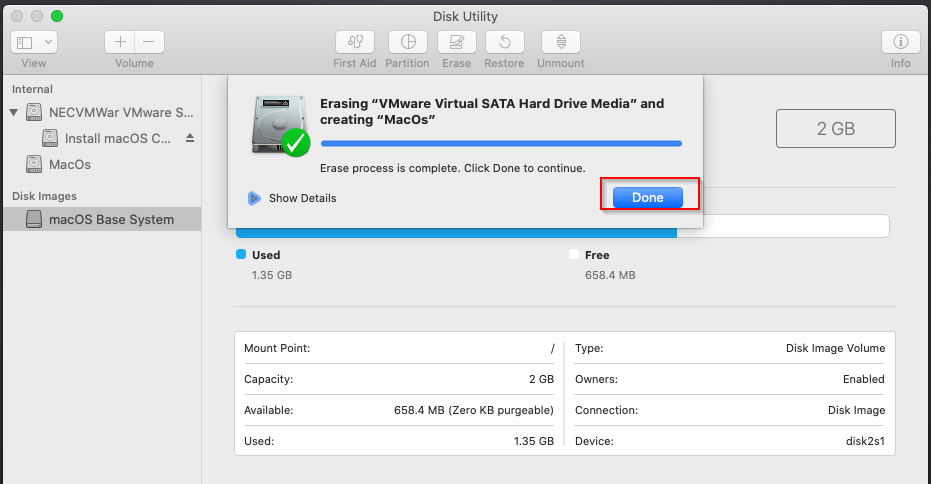
Once the erasing process is complete, close the Disk Utility Window by clicking "Done." It will direct users to the installation screen of macOS Catalina. Click the Select option to install it.
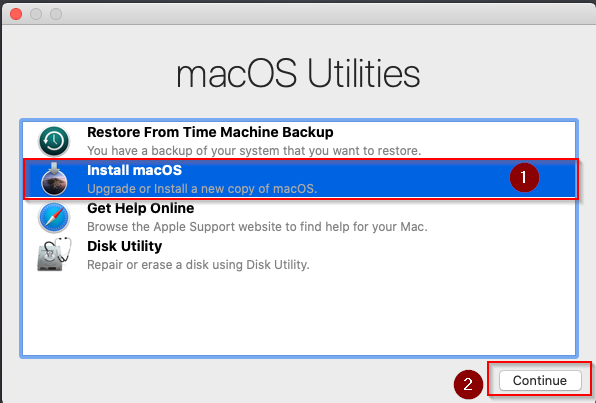
Click on the “Install MacOS” and then "Continue," once the installation starts, choose the drive the users have created in the Disk Utility and press "Continue."
Then again click on “Continue.”

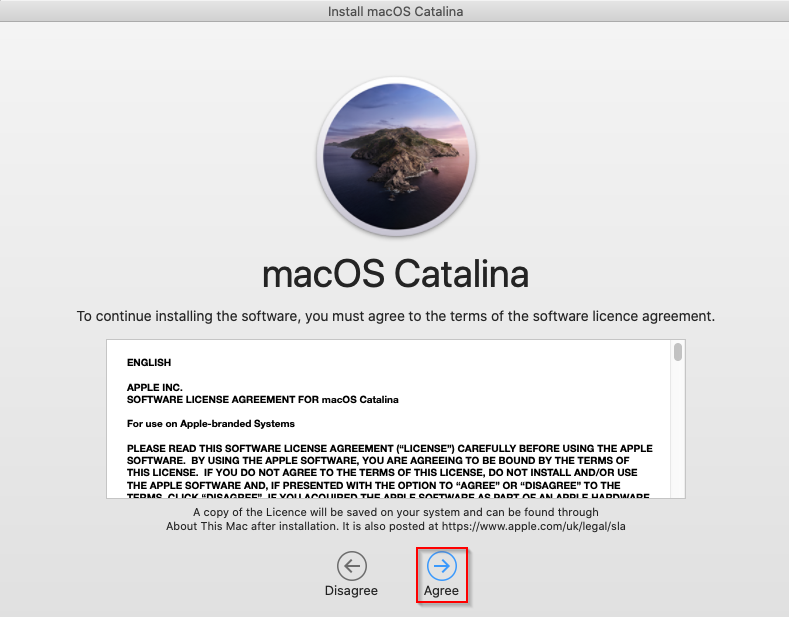
Select “Agree.”
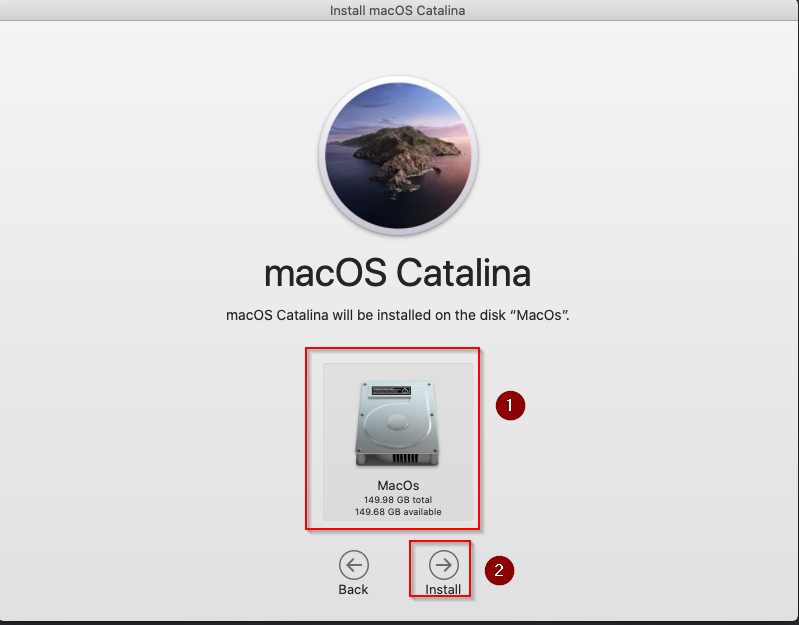
Select the disk and click “Install.”

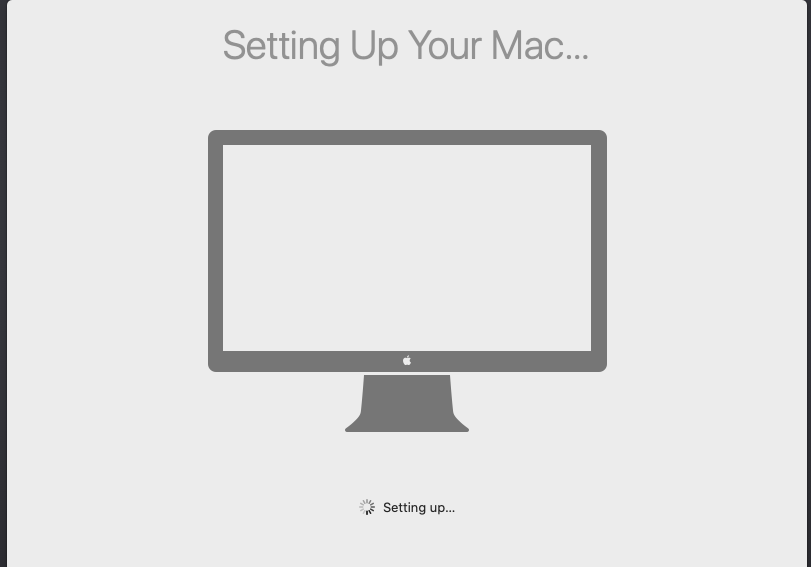
Go to the Mac OS Setting and perform some basic operations needed. It will install the Mas OS successfully on VMWare.
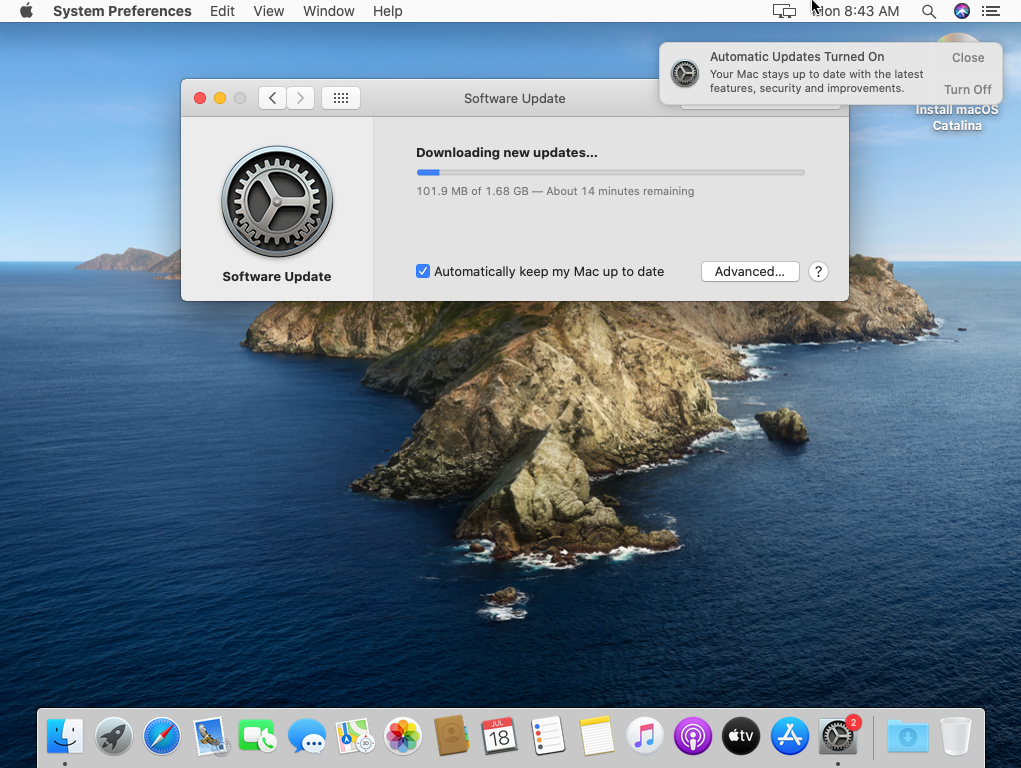
Update Mac OS (if update available)
Wrapping up:
This article is about the installation of macOS on windows VMware. We have shown the installation steps for the Catalina virtual machine with VirtualBox. It is a brilliant idea if users want to try macOS before switching from Windows and enjoying some of the best Apple applications on offer.