Using CSS, users can add different features to their web page. When users use multiple CSS rules within the same HTML element, they should direct the browser with the rule of thumb to signify which styling instruction should take priority.
Depending on which selector type users use to style the HTML element, these rules will set or determine which style overrides the other. It is what the article will briefly discuss with its different criteria users can use in CSS.
What is Overriding mean in CSS?
To override means to use the property of one CSS class over another. Overriding in CSS indicates that users use any style property to the specified HTML element for which they have already provided the CSS style.
For example, if users want to change the CSS style they have used to the HTML element using an external CSS, but if they do not find where they have written the line of code, then they can only override another CSS style by using inline CSS which has the highest precedence. Also, they can use or !important directive that overrides the CSS class over another.
The order of priority inline style is as follows:
inline stylesheet (highest) >> <style>…</style> tags >> external style sheet (lowest)
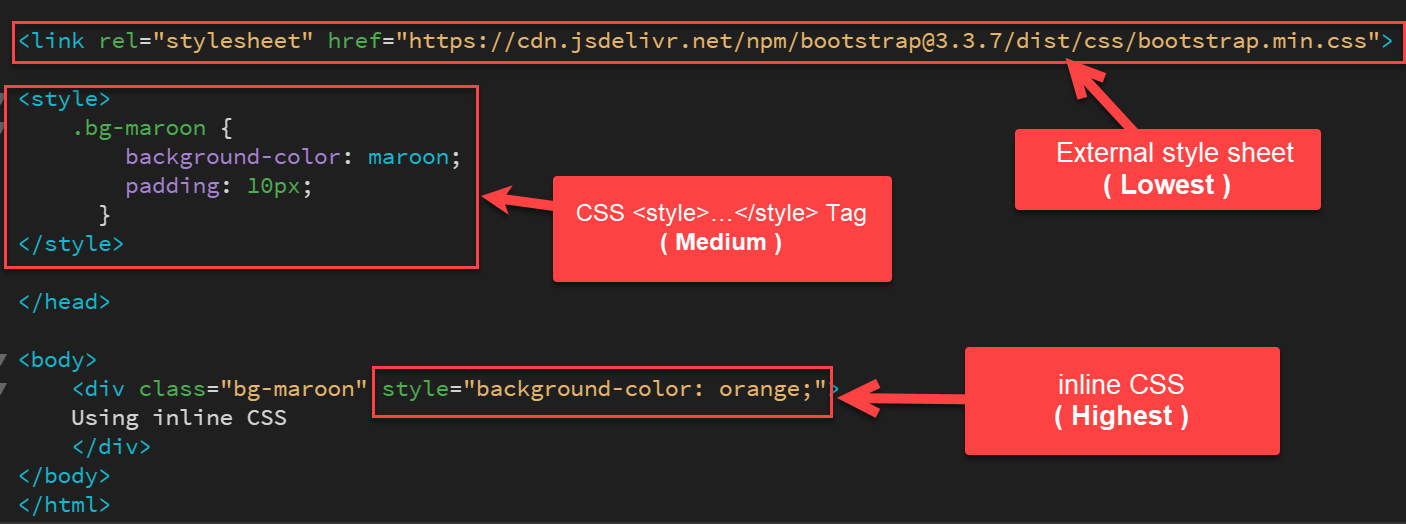
So, when there appears a conflict between two or more CSS styles under the same HTML element, the last style that users will use will take precedence.
The below two rules will make users clear about the concept:
- Users must place the inline styles inside the HTML <body> tag of the HTML document. While they must place the embedded style sheets inside the HTML <head> tag of the HTML document so that the browser uses the inline styles as the last used ones and take precedence.
- In an HTML document, the internal style sheets take a higher priority than external ones. It is only because the browser will always consider the external style sheets or linked style sheets to come before the internal style sheets or embedded sheets, even if users use them or put them after.
Let us look at the different overriding styles in CSS:
- CSS ID selector (Recommended)
- CSS Class selector (Recommended)
- Another CSS Class (Recommended)
- Inline CSS (Not Recommended, Not Supported in AMP pages)
- !important directive (Not Recommended, Not Supported in AMP pages)
Method 1: Overriding CSS style with the ID selector:
<html>
<head>
<style>
	.demo {
    	color: maroon;
        font-weight: normal;
    }
	#sample1 {
    	color: coral;
    	font-weight: bold;
    }
</style>
</head>
<body>
	<p id="sample1" class="demo">
      It is an example of CSS class overriding where we are using an <strong>ID selector to override</strong>.
    </p>
</body>
</html>
Output:
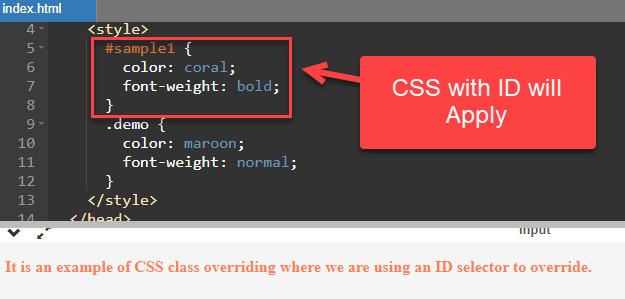
Explanation:
In the above code snippet, we can see that the ID gets precedence when we place the class after the ID. We can only use this when we set the ID and the CSS class under the same HTML element.
Method 2 Overriding CSS style with the Class selector:
<html>
<head>
<style>
	#sample1 {
        color: #786435;
        font-style: italic;
        background-color: green;
      }
     .demo{
		 display: block;
		 color: maroon;
         font-style: bold;
      	 background-color: coral;
		 padding: 10px;
      }
</style>
</head>
<body>
	<div id = "sample1">
      <span class = "demo">
        It is an example of CSS class overriding where we use an CSS selector to override...
      </span>
    </div>
</body>
</html>
Output:
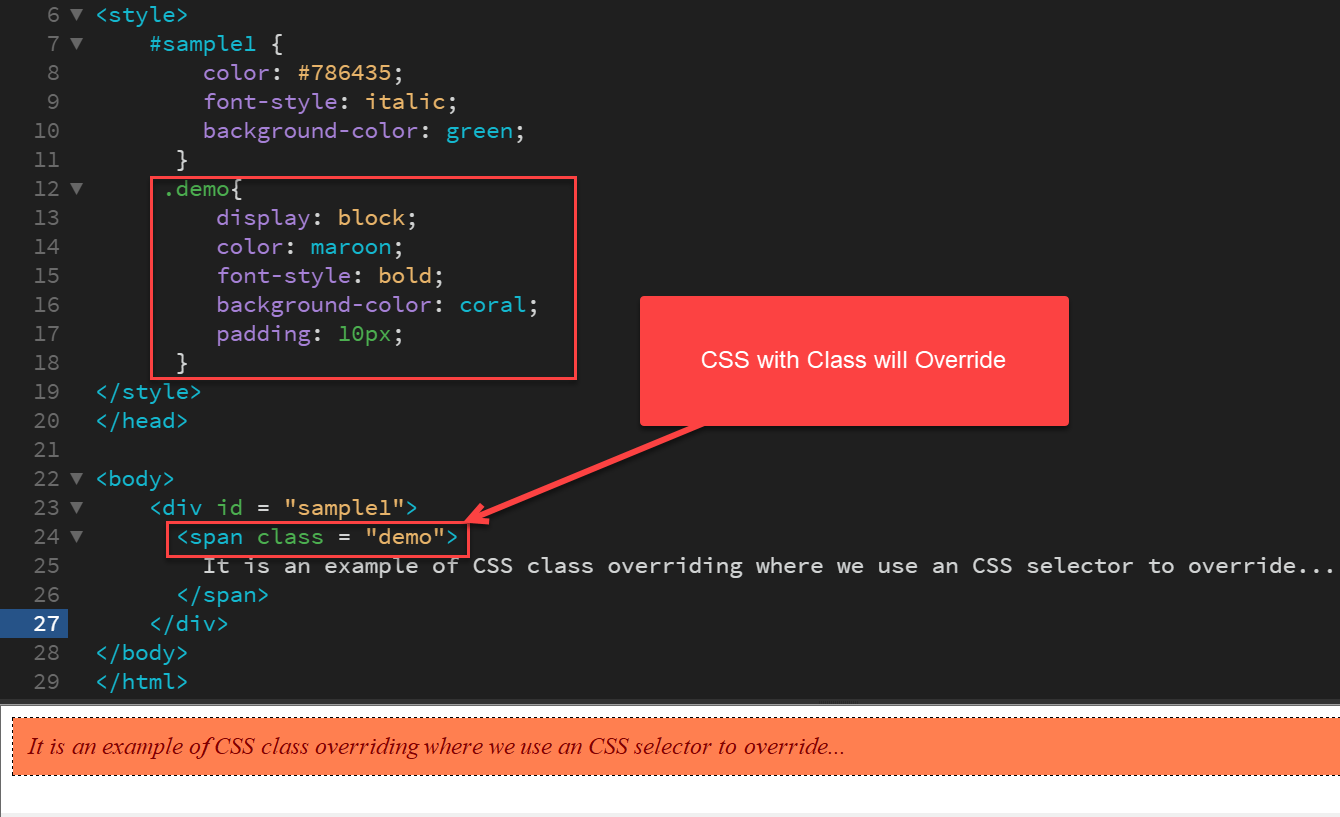
Explanation:
As we have discussed, when we use the Class selector and the ID selector under the same HTML element, the ID selector will have precedence. But in the above code example, we used the Class selector in the last; it will override the ID selector.
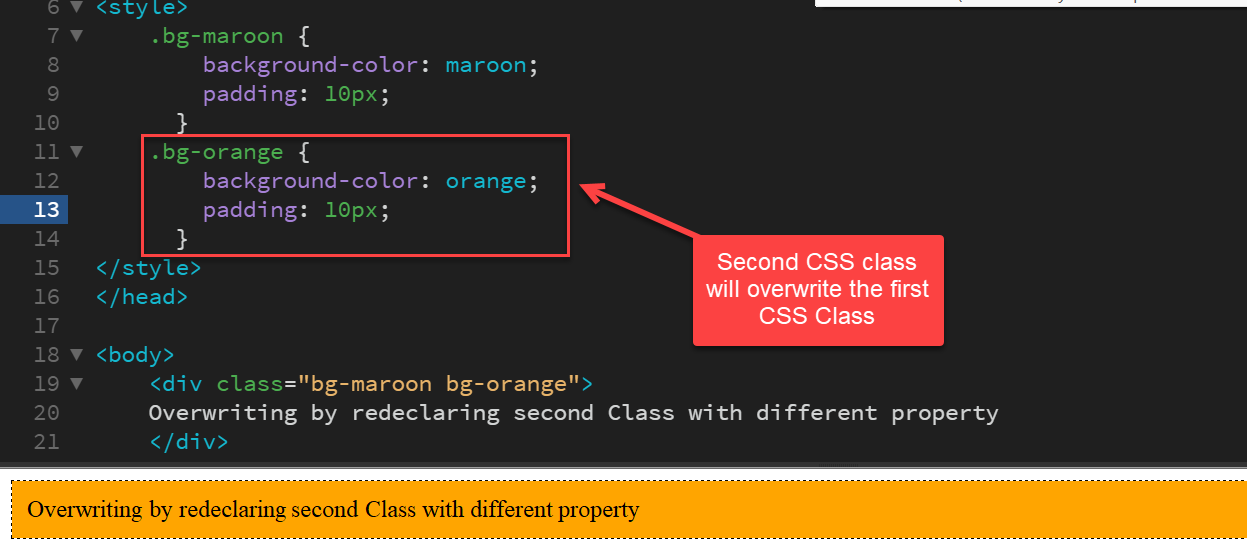
Method 3: Creating CSS class with different property
There are other techniques to override CSS style. Users can apply using one CSS class over another. Let us learn how users can use CSS to override one CSS class over another using the code snippets.
Code Snippet:
<html>
<head>
<style>
	.bg-maroon {
        background-color: maroon;
		padding: 10px;
      }
	.bg-orange {
        background-color: orange;
        padding: 10px;
      }
</style>
</head>
<body>
	<div class="bg-maroon bg-orange">
    Overwriting by redeclaring second Class with different property
    </div>
</body>
</html>
Output:
Explanation:
Users can use the dot operator to specify a CSS class name, i.e., .class_name {}. Here, in this example, we have used two CSS classes, namely bg-maroon and bg-orange. In the second class, i.e., inside the CSS class bg-orange, we defined the background color and padding of the text with a value of orange and 60 px. The text inside the HTML <div> tag will refer to the second class.
Note: Users can also change the property of the <div> tag by changing the style in the CSS class itself.
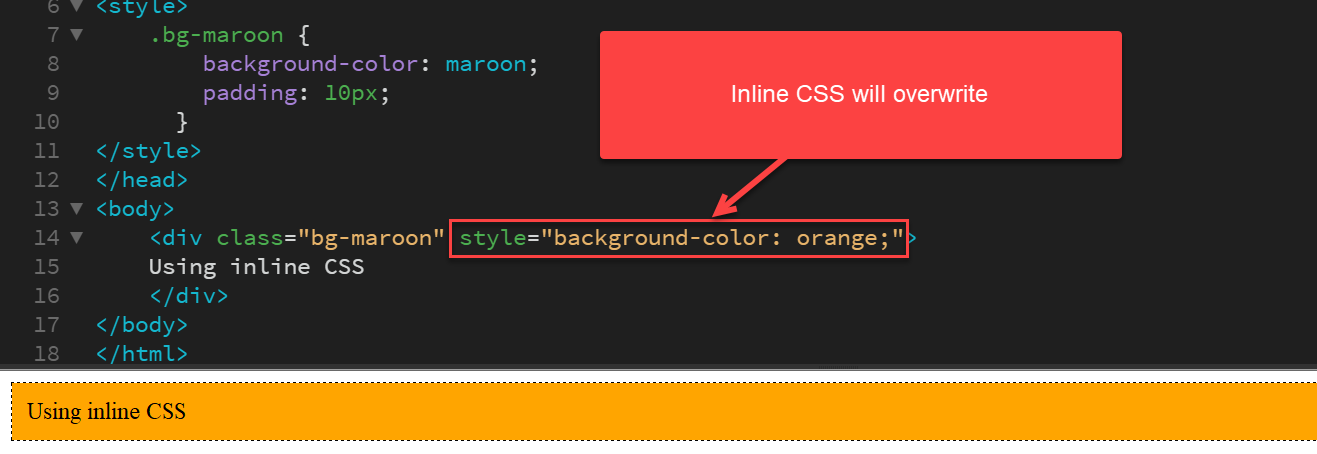
Method 4: Using Inline CSS
As we know inline CSS is the highest weight so it will overwrite all other CSS class
Syntex:
<div class="bg-maroon" style="background-color: orange;">Using inline CSS</div>
Code:
<html>
<head>
<style>
	.bg-maroon {
        background-color: maroon;
		padding: 10px;
      }
</style>
</head>
<body>
	<div class="bg-maroon" style="background-color: orange;">Using inline CSS</div>
</body>
</html>
Output:
Note: Not recommended, Not Supported in AMP pages
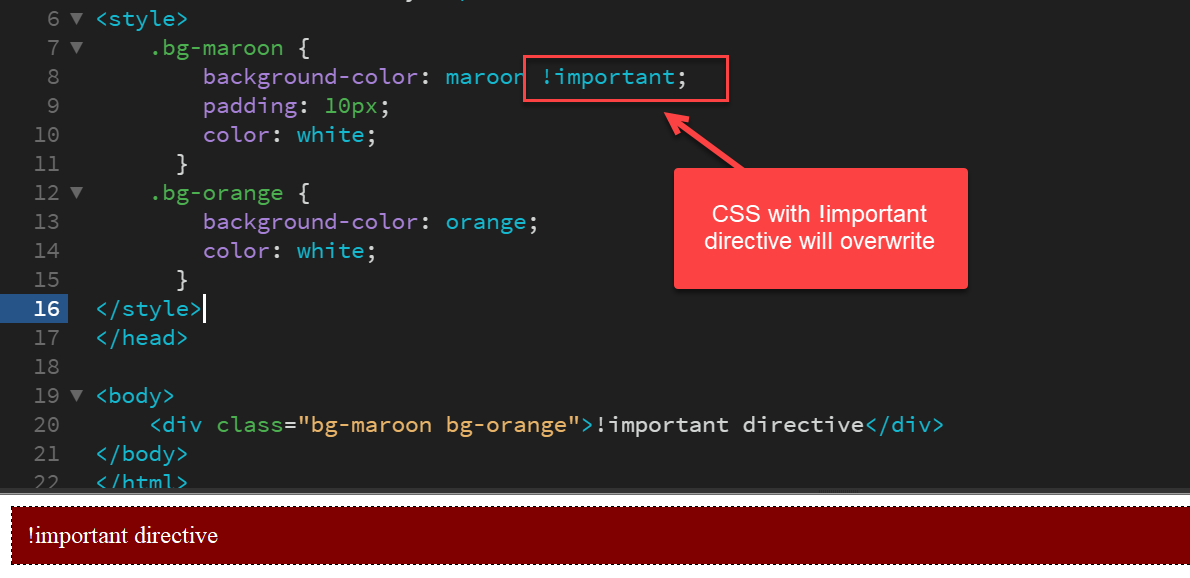
Method 5: Using !important directive
The last method involves one of the most crucial techniques in CSS to override style is the !important directive. To declare a class with the !Important directive is an excellent way to override the styles users want.
When users use any essential rule on the CSS style declaration, this declaration will override the other CSS styles.
Let us see how !important directive works:
Code Snippet:
<html>
<head>
<style>
	.bg-maroon {
        background-color: maroon !important;
		padding: 10px;
		color: white;
      }
	.bg-orange {
        background-color: orange;
		color: white;
      }
</style>
</head>
<body>
	<div class="bg-maroon bg-orange">!important directive</div>
</body>
</html>
Output:
Note: Not recommended, Not Supported in AMP pages
Explanation:
The directive prioritizes that CSS style property with which users will add the "!important." It indicates the style is important and can override the inline styling. In the code lines, we have added the "!important" at the end of the styling instruction line.
Conclusion:
When users use a CSS style inside an HTML element, they can change its property by changing or adding a new property in that class. Also; alternatively, they can add a new CSS class with a new property. Overriding a CSS class is easy, efficient, and can save time. We hope all the above techniques in this article help you with CSS style overriding.