If you always see an “Activate Windows” watermark at the bottom-right corner of your system’s desktop it means you haven’t activated your copy of Windows 10 once the 90-day trial period is over. This watermark usually says “Activate Windows – Go to Settings to activate Windows”.
Cause of this Issue
This “Activate Windows – Go to Settings to activate Windows” watermark appears on your system when you do not activate your copy of Windows 10 once the 90-day trial period is over.
SOLUTION
Here in this article, we will learn some simple and easy methods to remove activate windows 10 watermark without purchasing a Product key.
Here are the following solutions to remove 'activate window' watermark:
Method 1: Edit the Registry
You need to modify the registry to remove the activate watermark from Windows 10.
Please follow the steps below:
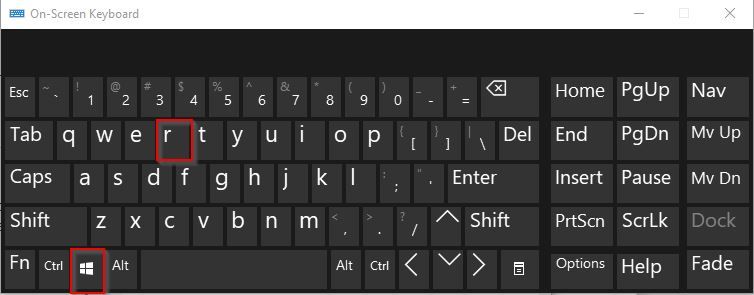
Press Window + R to open the Run dialog box on your system
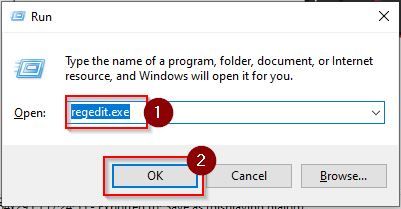
Next type regedit.exe on Run dialog box and press Enter or click OK
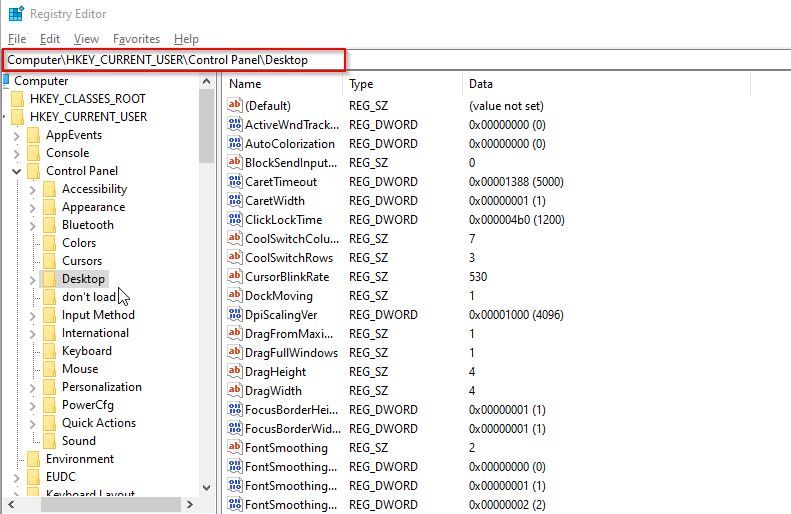
Now expand or navigate to HKEY_CURRENT_USER>Control Panel>Desktop.
Next scroll down to value PaintDesktopVersion and double click on it
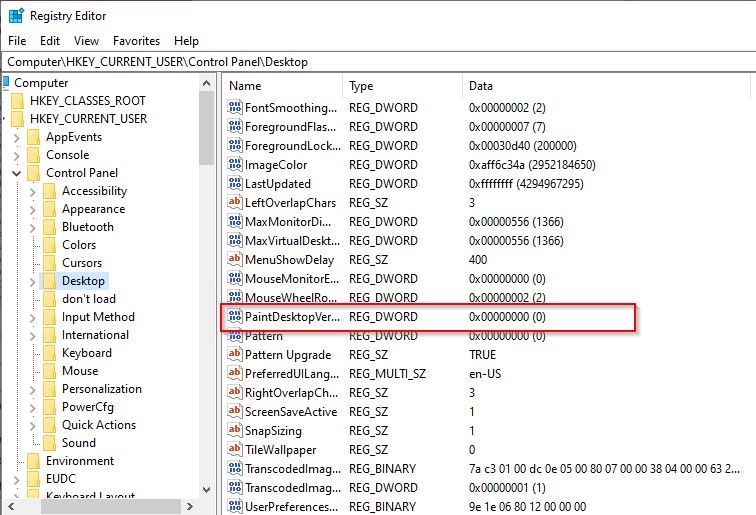
Now set 'Value Data' to 0 and then click the “OK” button to save the changes made
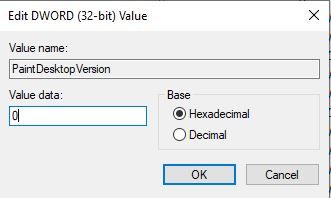
Now reboot your computer and check if the watermark has been gone.
Method 2: Run Batch File
Another method to remove the “Activate Windows” watermark from Windows 10 is a simple notepad trick. Simply create the following Notepad file and save it in the .bat extension on your computer and run it to kill the watermark process.
Please follow the steps below:
Go to Search box via start menu, type Notepad and press Enter
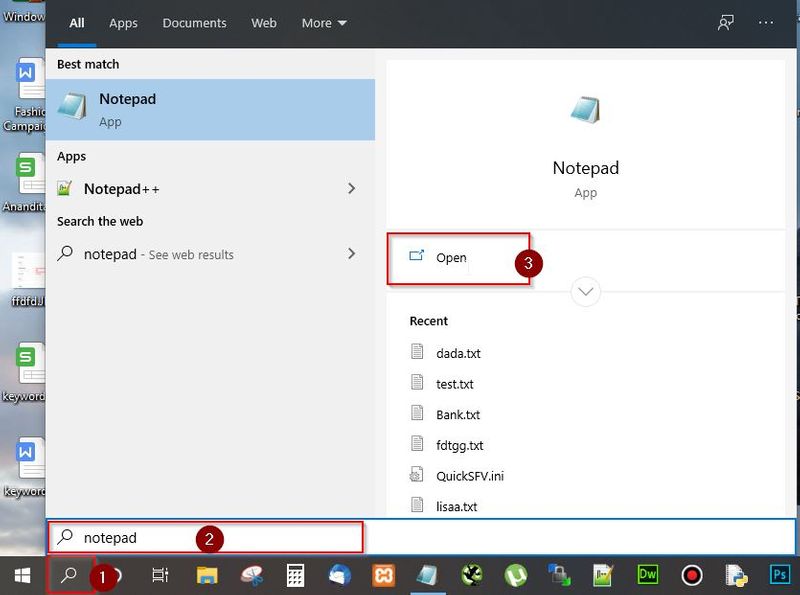
Next it the notepad type the command mentioned below
@echo off
taskkill /F /IM explorer.exe
explorer.exe
exit

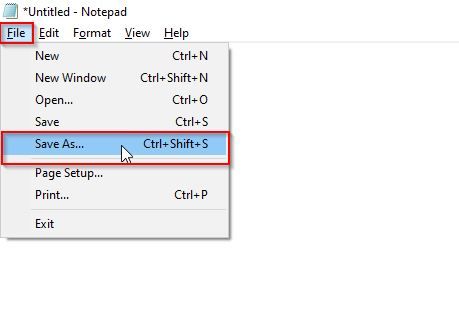
Next click the File tab on notepad menu bar and select the option 'Save as'
Name the file as remove.bat and change the Save as type to All Files (*.*)
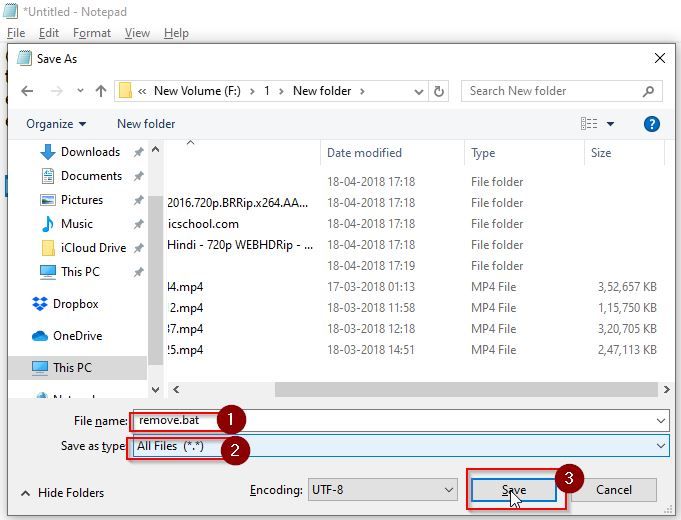
Next, go to the file location where you saved the remove.bat file
Right-click on the file and select Run as Administrator
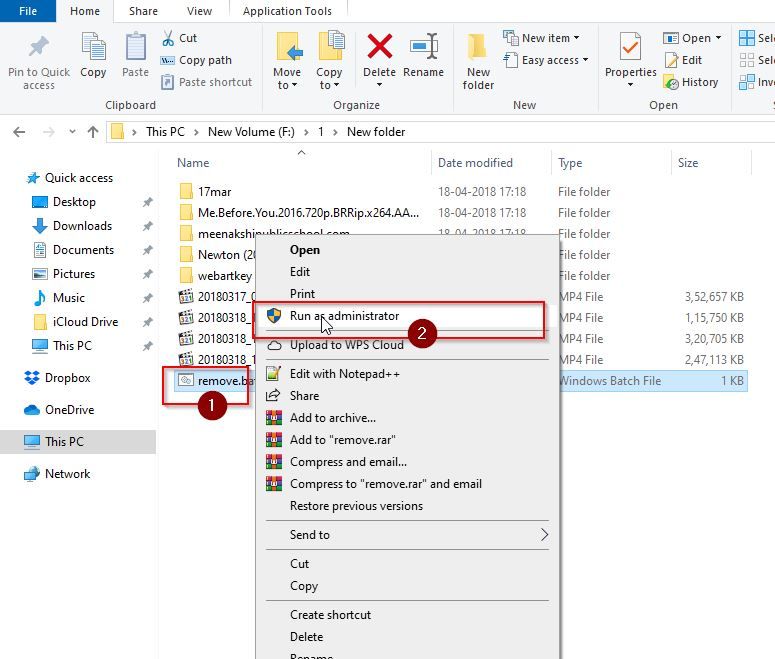
The “Command Prompt” window will open, the batch file will be run and executed and the window will close automatically. Then simply reboot Windows and you will notice that the “Activate Windows” watermark has been removed from your desktop.
Method 3: Perform Standard Settings
Another method to remove the 'Activate Windows' watermark is to perform standard setting on your computer
Please follow the steps below:
Go to Search Box via Start menu, type CMD and click on Run as administrator
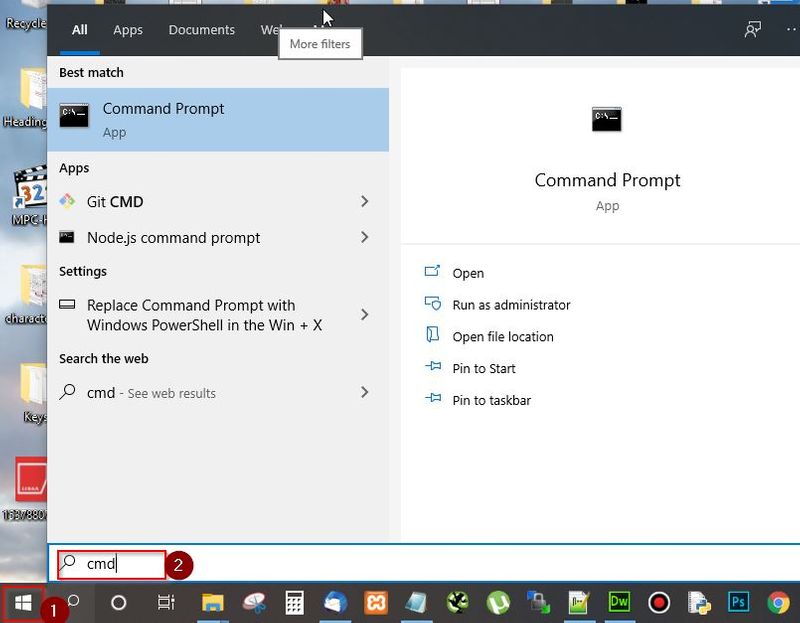
Next type bcdedit -set TESTSIGNING OFF in your command prompt and press Enter
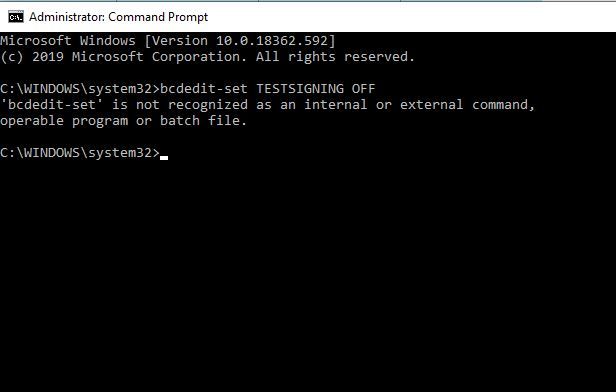
Now exit the cmd and reboot your system and then check if the Activate Windows 10 watermark have been resolved
Method 4: Ease of Access Settings
Please follow the steps below:
Go to Search Box via Start menu, type Control Panel and press Enter or click Open
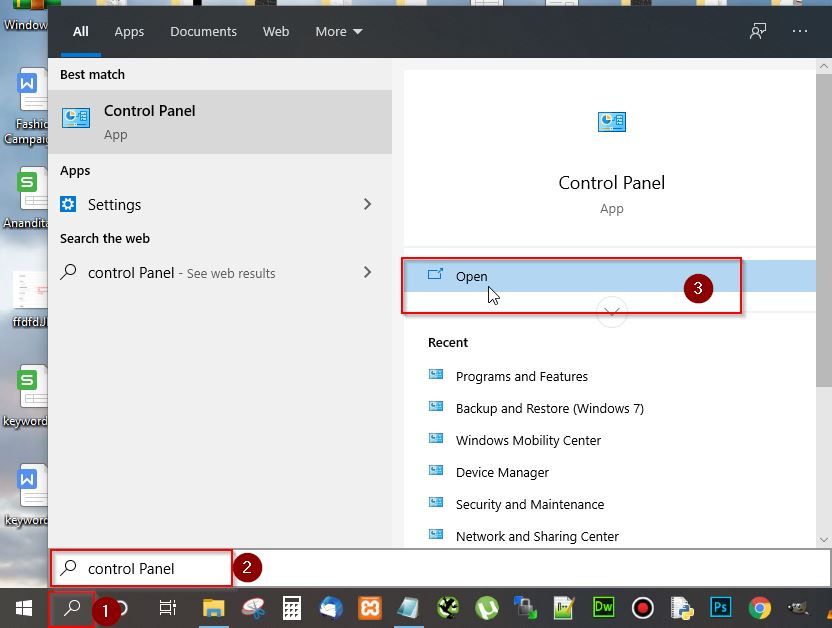
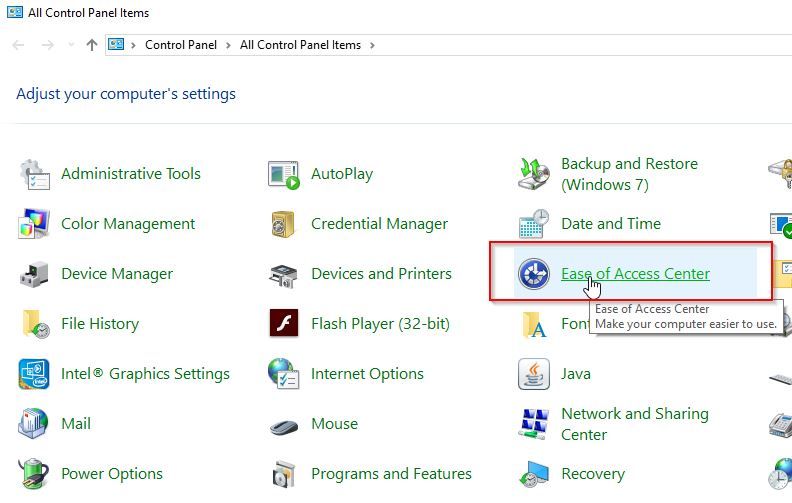
Next in the control panel select the option ease of access center.
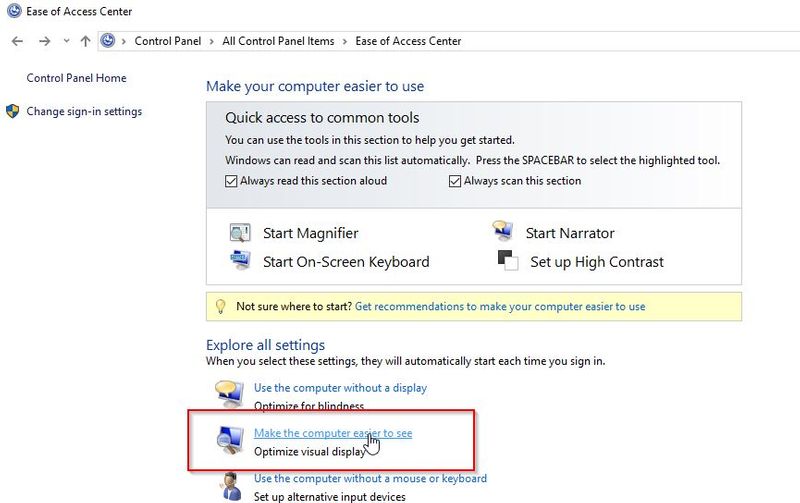
Now select the option Make the computer easier to see
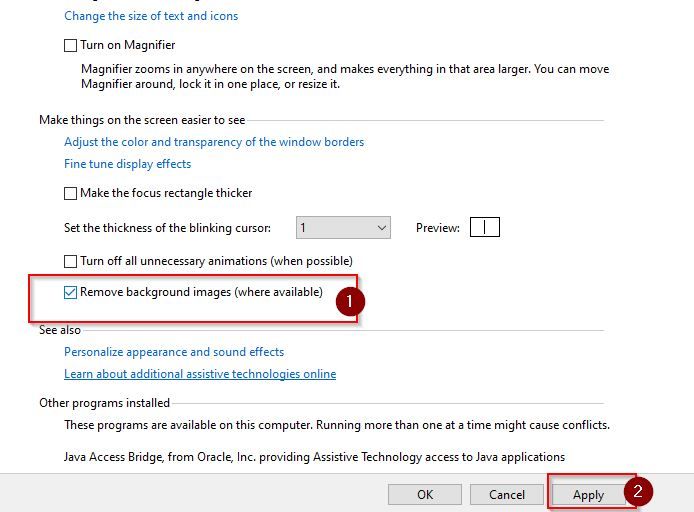
Next tick the box named remove background images and then click Apply.
Now restart your computer and check if Activate Windows 10 watermark has been removed
Conclusion
These are the four methods to remove “Activate Windows” watermark from your Windows 10 desktop computer or laptop. If you are still facing problems, let us know in the ‘comments section’ below.